Delicious Homemade Challah Recipe for Your Weekend Brunch
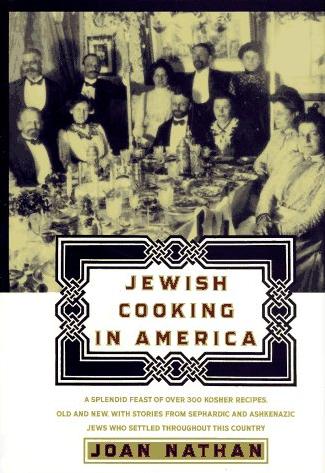
What’s better than the aroma of freshly baked breads coming out of the oven? As an Israeli chef, I know bread is the foundation of any good meal. Today, I’d like to introduce you to one of my favorite Jewish bread recipes – Manfred Loeb and Joan Nathan’s Challah.
Challah is a traditional Jewish bread that is often enjoyed on weekends, holidays, and other special occasions. The braided bread not only has a delicious flavor but also has significant symbolic meaning for Jewish culture. According to tradition, the bread represents the manna that fell from the sky when the Israelites were in the desert.
Manfred Loeb and Joan Nathan have created one of the most iconic Challah recipes known as “Manfred Loeb’s Challah.” This recipe has been passed down through generations of Jewish families and is now available for you to try out in your very own kitchen.
In this article, I will share with you all the necessary ingredients, step-by-step instructions, and insider tips to create a mouthwatering Loeb Challah. Get ready to turn up your baking game with this classic Jewish recipe!
Why You’ll Love This Recipe
Hey there foodies, Ehud here! If you are a fan of authentic Jewish cooking or just looking for some new baking inspiration, then this recipe is a must-try. It is the Manfred Loeb Challah from the one and only Joan Nathan. Trust me when I say that this recipe is a real winner and worth adding to your baking arsenal.
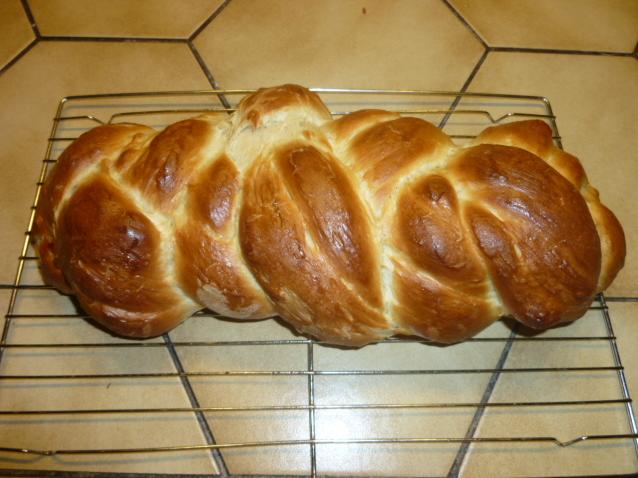
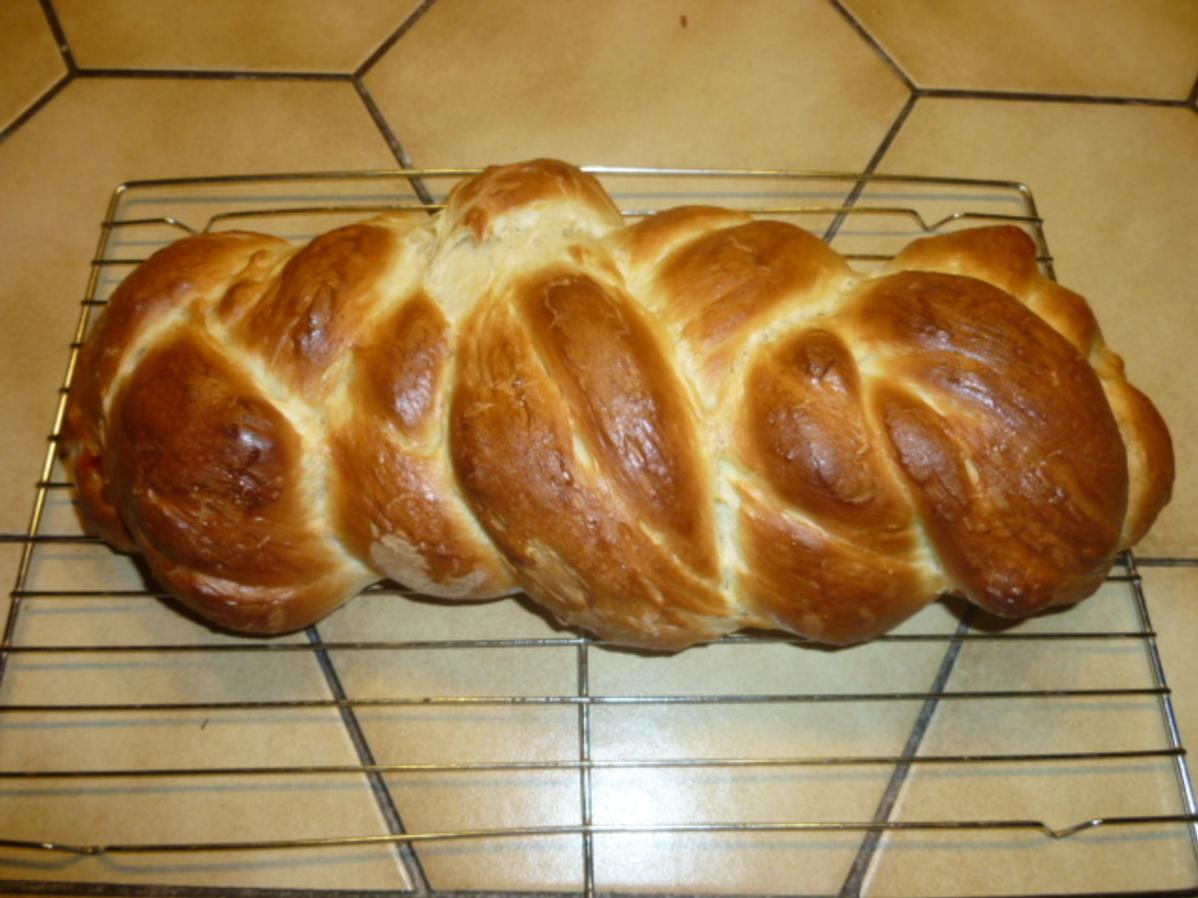
Firstly, let’s talk about the texture. This loaf is everything you want in a perfect Challah – soft with a slight chewiness, and an irresistible aroma once it’s out of the oven. The sesame seeds and poppy seeds on top add a nice crunch that elevates the flavor profile even more.
But wait, there’s more! The preparation of this bread is an enjoyable process that lets you get creative with your braiding techniques by allowing six braids instead of the traditional three. Not only does this make for beautiful presentation, but it also provides soft “pull apart” sections that are ideal for sharing during family and friend gatherings.
Furthermore, this recipe uses readily available ingredients such as bread flour, active dry yeast, salt, sugar, eggs, and a few extras to make things exciting- vegetable shortening.
Lastly, there’s nothing more satisfying than being able to make your own bread right in your kitchen. With this recipe you’ll look like a pro baker in no time- but shhh! That’ll be our little secret.
No matter if you’re new to baking or an experienced chef, I guarantee you will love this recipe. So go ahead and give it a try – I can’t wait to hear how much you enjoyed it!
Ingredient List
Here are the ingredients you’ll need to make Manfred Loeb’s Challah (adapted from Joan Nathan’s recipe):
For the dough:
- 2 packages active dry yeast
- 1 and 1/2 cups warm water (105-115°F)
- 1/2 cup sugar
- 5 eggs, lightly beaten
- 1 and 1/4 teaspoons salt
- 1/2 cup vegetable shortening, melted
- 8 cups bread flour
For the topping:
- 1 egg, lightly beaten, for egg wash
- Sesame seeds or poppy seeds for sprinkling
Note: All-purpose flour can be substituted for bread flour.
The Recipe How-To
Step 1: Activate the Yeast
– In a large bowl, dissolve 2 packages of active dry yeast and 1/2 cup of sugar in 2 cups of warm water (105° to 115°F). Let sit for about 10 minutes, until foamy.
Step 2: Combine Ingredients
– Add 3 eggs, 1 tablespoon salt, and 1/2 cup vegetable shortening into the yeast mixture. Mix well.
– Gradually stir in 9-10 cups of bread flour until the dough comes together.
Step 3: Knead the Dough
– Lightly flour a work surface and turn out the dough onto it.
– Knead for about 10 minutes until you get a smooth, elastic dough.
Step 4: Rise Time
– Place the dough in a large, clean bowl and cover with a damp towel.
– Let it rise for about an hour and half or until doubled in size.
Step 5: Shape and Braid
– Punch down the risen dough and divide it into three equal parts.
– Roll each part into long snakes and join them together at one end, then braid them.
– Tuck the ends under and place on a greased baking sheet.
Step 6: Second Rise Time
– Preheat oven to 375°F. Cover the braided dough with a clean towel and let rise again for another 30 minutes.
Step 7: Add Seeds
– Beat one egg with a little bit of water and brush over the top of the Challah.
– Sprinkle with your preferred toppings such as poppy seeds or sesame seeds.
Step 8: Bake
– Bake for about 30 minutes or until golden brown in color.
– Remove from oven, transfer to a wire rack, and let cool before slicing.
Now that you know how to make this delicious Manfred Loeb’s Challah recipe, give it a try! The result is worth it!
Substitutions and Variations

Are you feeling adventurous and want to try something different with this recipe? No worries, I have got you covered. Here are some substitutions and variations you can try to add a little twist to your challah:
– For a nutty flavor, add chopped walnuts or pecans to the dough before baking.
– If you don’t have bread flour, you can use all-purpose flour instead, but keep in mind that the texture may not be as dense and chewy. You can also use a combination of all-purpose and whole wheat flour for a healthier option.
– Instead of sesame seeds or poppy seeds, try using everything bagel seasoning to give your challah an extra kick of flavor.
– For a sweeter version of this recipe, add raisins or cinnamon to the dough before braiding.
– If you prefer a dairy-free version, replace the vegetable shortening with coconut oil or olive oil.
– If you want a smaller batch, simply cut the ingredient list in half.
Remember that cooking is all about experimenting and finding what works for you. Don’t be afraid to try out new ingredients and techniques!
Serving and Pairing
Warning: You’re about to make the most delicious challah you’ve ever had, so make sure you’re ready to indulge! Once your Manfred Loeb Challah is cool enough to handle, slice it up and enjoy it plain, as toast with a schmear of butter or cream cheese, or even in a sandwich.
But don’t stop there! The sesame seeds and poppy seeds are not only visually appealing but also add great flavor. Pair this braided beauty with some homemade hummus or baba ghanoush for a savory dip experience that’ll blow your taste buds away.
If you have any leftovers, an awesome option is to turn your bread into French toast or bread pudding. Or if you’re more adventurous, try using the challah instead of regular bread for stuffing in dishes like Thanksgiving turkey or any vegetarian alternative. Trust me; Even people who usually prefer store-bought bread crumbs will appreciate just how soft and fluffy this homemade recipe-food-com is.
Do you love pairing food with wine? Serve your Manfred Loeb Challah alongside a white Burgundy, Champagne or even a fruity rose if that’s more your style. But if you prefer something solid instead of sipping on alcohol, I suggest going for a nice beurre blanc sauce or hollandaise, which pair beautifully together or separately with this challah.
There are no limits as to how creative you can get with serving and pairing the Manfred Loeb Challah; It’s perfect for breakfast, lunch, dinner, snacktime – anytime!
Make-Ahead, Storing and Reheating

One of the best things about Manfred Loeb’s Challah recipe is that it can be made ahead of time, stored, and reheated without losing its flavor or texture. This makes it perfect for meal prep and convenient for busy days.
To make ahead, simply follow the recipe instructions until the Challah is completely baked. Once cooled, wrap it tightly with cling wrap and store in a ziplock bag. You can then freeze it for up to two months or refrigerate it for up to three days.
When you’re ready to enjoy your homemade Challah, simply take it out of the freezer or refrigerator and let it come to room temperature. For best results, reheat it in the oven by wrapping it in foil and placing it in a preheated oven at 350°F (175°C). Alternatively, you can slice it and toast it in a toaster or toaster oven until golden brown.
It’s important to remember that Challah can dry out quickly if not stored properly. Therefore, always make sure the bread is wrapped tightly to prevent air from getting in. This will help keep your Challah fresh and flavorful even after reheating it.
By following these simple storage and reheating instructions, you’ll be able to enjoy your Manfred Loeb’s Challah anytime you want without compromising on its taste or quality.
Tips for Perfect Results
Now that you know how to make Manfred Loeb’s Challah, let me share with you some tips that I’ve learned to ensure perfect results every time.
First and foremost, don’t skimp on the rising time. The dough needs time to develop gluten and rise properly. If you rush through these steps, you’ll end up with a dense and tough loaf of bread.
Next, be sure to preheat your oven. This recipe calls for a high temperature of 375°F, so it’s important to give your oven enough time to reach that temperature before baking your challah.
When braiding the challah, remember to pinch the ends tightly so that they stay together during baking. Also, try not to overhandle the dough as this can cause it to become tough.
For an extra pop of flavor and texture, try sprinkling sesame seeds or poppy seeds on top of the egg wash before baking. This will add a nice crunch and nutty flavor to your finished challah.
If you’re short on time or don’t have all the exact ingredients on hand, don’t be afraid to make substitutions. You can use butter instead of vegetable shortening, or all-purpose flour instead of bread flour. Just keep in mind that these substitutions may affect the final texture and taste of your challah.
Finally, when serving your freshly baked challah, be sure to slice it thinly and serve it alongside your favorite spreads and dips. It pairs perfectly with hummus, baba ganoush, or even just a drizzle of honey.
By following these tips, you’ll be well on your way to creating a perfectly braided and delicious loaf of Manfred Loeb’s Challah every time.
FAQ
Now that you know how to make this delicious Manfred Loeb’s Challah following Joan Nathan’s recipe, it is time to address some frequently asked questions about the process. Don’t worry; I’m here to answer all of your queries so that when it comes time to start baking, you’ll have all the information you need. So let’s dive into some of the most common concerns and questions about making this Challah.
What is the best flour for challah?
For this challah recipe, all-purpose flour is a viable option as per Myrna’s original recipe. However, I have found that using bread flour not only adds some chewiness to the bread but also helps keep the braided loaf in shape post baking.
What oil is best for challah?
When preparing challah, it is important to note that if you opt for all-purpose flour, you may need to increase the quantity by 1-2 tablespoons. This is due to the fact that all-purpose flour does not absorb liquid as readily as bread flour does. As someone who has made numerous challah variations, I strongly suggest incorporating olive oil into your recipe. Do not settle for plain, tasteless vegetable oil. A good quality olive oil will provide an added savory element to your finished product.
What does challah symbolize?
Challah bread is not only a delicious treat, but also holds significant symbolic value in Jewish tradition. One notable aspect of this bread is the mitzvah of separating a portion of the dough before braiding, as a contribution to the Kohen (priest). This is known as the hafrashat challah commandment.
Can you let challah rise too long?
When it comes to the second rise of your dough, also known as proofing, it’s essential to give it ample time to develop flavor. Remember, the slower the rise, the better the taste. However, it’s crucial not to let the dough over proof. Over proofing can cause large air bubbles, leading to bursting and deflation while in the oven. So, keep an eye on the dough and don’t let it proof for too long.
Bottom Line
In conclusion, if you are looking for a delicious and traditional Jewish baked good, you must try Manfred Loeb’s Challah recipe. It is easy to follow, requiring only a few basic ingredients, and can be adjusted to suit personal preferences. The results are always impressive, with a wonderful aroma and flavors to delight the senses.
Whether it is for a holiday, special occasion, or simply to enjoy as a treat with family and friends, this recipe is sure to please. So why not give it a try today? With the help of Joan Nathan’s expert guidance and our tips for perfect results, you will be able to make a batch of homemade bagels that will have everyone asking for more.
I hope these instructions have been helpful in guiding you through the process of making Manfred Loeb’s Challah. Remember to have fun in the kitchen, be creative with your flavors and add your own personal touch. Happy baking!
Manfred Loeb’s Challah ( Joan Nathan) Recipe
Ingredients
- 2 (1/4 ounce) packages active dry yeast
- 1/4 cup sugar
- 1 1/4 cups warm water (105-115 F)
- 5 -6 cups bread flour
- 2 teaspoons salt
- 2 large eggs
- 1/4 cup vegetable shortening
- poppy seed (optional)
- sesame seeds (optional)
Instructions
- Dissolve yeast in warm water with a big pinch of sugar.
- Place the flour in a large bowl. Add the dissolved yeast and stir with a spoon. Add the remaining sugar, salt, eggs, and vegetable shortening. Beat about 1 minute and then mix by hand. When the dough begins to leave the side of the bowl, turn it onto a lightly floured surface to knead and Knead for about 15 minutes until soft, adding more water or flour as necessary.
- Place the dough in a lightly greased bowl, turning the dough over so that the entire surface is lightly greased. Cover with a cloth. Let rise in a warm place for an hour or more , until the dough is doubled . Punch down. Divide into 2 balls.
- Preheat Oven to 375°F.
- Divide each ball into three pieces. Roll each piece into a (appox 12") strand and braid, then tuck in ends. ( he gives a six strand braiding method that is really confusing so I use the 3 strand method).
- Place braid onto either cornmeal sprinkled or parchment paper lined ( I use parchment paper) sheet. Use 3rd egg ( beaten with a bit of water) and brush ( using a pastry brush) the Challah. If using sesame or poppy seeds, sprinkle over at this time. Cover with a plastic sheet ( spray with Pam first) and let rise 30 minutes.
- Bake for 15 minutes or until golden brown.