Mouth-Watering Challah Recipe: Perfect for any Occasion!
When it comes to bread, there’s nothing quite like the smell of freshly baked challah. The soft, buttery texture and slightly sweet taste make this traditional Jewish bread a favorite among many. That’s why I want to share with you my all-time favorite recipe for challah, straight from the kitchens of Cook’s Illustrated.
As a chef who specializes in Israeli cuisine, I’ve experimented with countless recipes for challah over the years, but this one is by far my go-to recipe. The folks at Cook’s Illustrated really know their stuff when it comes to baking, and this recipe is no exception.
What sets this recipe apart from others is the use of the tangzhong method, a Chinese technique that creates an incredibly tender and moist bread. The addition of egg yolks and sugar also gives it a rich sweetness that pairs perfectly with savory dishes or as the star of a french toast brunch.
Even if you’re new to bread baking or feel intimidated by braided challah, fear not! This recipe breaks down each step in an easy-to-follow format and includes tips and tricks for perfect results every time. So turn on your oven, dust off your flouring station, and get ready to bake some of the best challah you’ve ever tasted.
Why You’ll Love This Recipe
If you’re looking for a tasty and satisfying bread recipe, then look no further than this delicious challah bread from Cook’s Illustrated! This braided challah is easy to make, and it’s perfect for serving at any meal – whether you’re enjoying breakfast, lunch, or dinner.
One of the reasons that I love this recipe so much is that it uses simple ingredients that you probably already have in your kitchen. With ingredients like warm water, unsalted butter, eggs, salt, instant yeast, sugar, and unbleached all-purpose flour, you can make a rich and sweet loaf of bread that will fill your home with the aroma of freshly baked goodness.
Another reason that I think you’ll love this recipe is its versatility. You can add poppy seeds, sesame seeds or other toppings to your challah bread to give it an extra burst of flavor. And if you’re feeling creative, you can even shape the dough into different forms – like round challah loaves or challah rolls!
But best of all, this easy braid challah is perfect for serving with everything from soups and salads to eggs and bacon. And if you’ve got some leftover challah bread lying around, why not use it to make some delicious French toast? Trust me, your taste buds will thank you!
So what are you waiting for? Try out this Challah recipe today and discover why it has become a favorite among both professional chefs and home cooks alike!
Ingredient List
For this recipe, we will need the following ingredients:
- Warm water: 1 1/4 cups
- Instant yeast: 2 1/4 teaspoons
- Sugar: 1/4 cup plus 1 teaspoon
- Unsalted butter: 4 tablespoons, melted
- Eggs: 2 large egg yolks
- Salt: 2 teaspoons
- Unbleached all-purpose flour: 4 cups plus dusting for work surface
- Poppy seeds for sprinkling on top of braided loaf
All the ingredients mentioned above are crucial to get the perfect flavor and texture of challah bread. You can find these ingredients at your nearest grocery store or market. The recipe originates from Cook’s Illustrated, which is known for meticulous testing of the recipes they propose to ensure that they offer the best possible outcome.
The Recipe How-To

Step One: Prep the Dough
To start, I’ll need to prepare my dough. In my stand mixer, I’ll whisk together half a cup of warm water with one tablespoon of instant yeast and a pinch of sugar to activate the yeast. Once the yeast is active, I’ll add in 4 eggs (room temperature), 4 egg yolks (room temperature), three-quarters of a cup of sugar, and 1/2 cup of unsalted butter (melted and cooled). After everything is combined, I’ll slowly add in 6 1/2 cups of unbleached all-purpose flour (plus extra for dusting).
Step Two: Knead the Dough
My next step is to knead the dough. In my stand mixer fitted with a dough hook, I’ll knead the dough for 8-10 minutes until it’s smooth and elastic. Alternatively, if I don’t have a stand mixer, I can knead by hand on a well-floured surface for about 10-12 minutes.
Step Three: Rise the Dough
After kneading the dough, I’ll form it into a ball and place it in a buttered bowl. Then cover it loosely with plastic wrap or a damp kitchen towel and let it rest and rise for about 1-2 hours until it has doubled in size.
Step Four: Shape the Dough
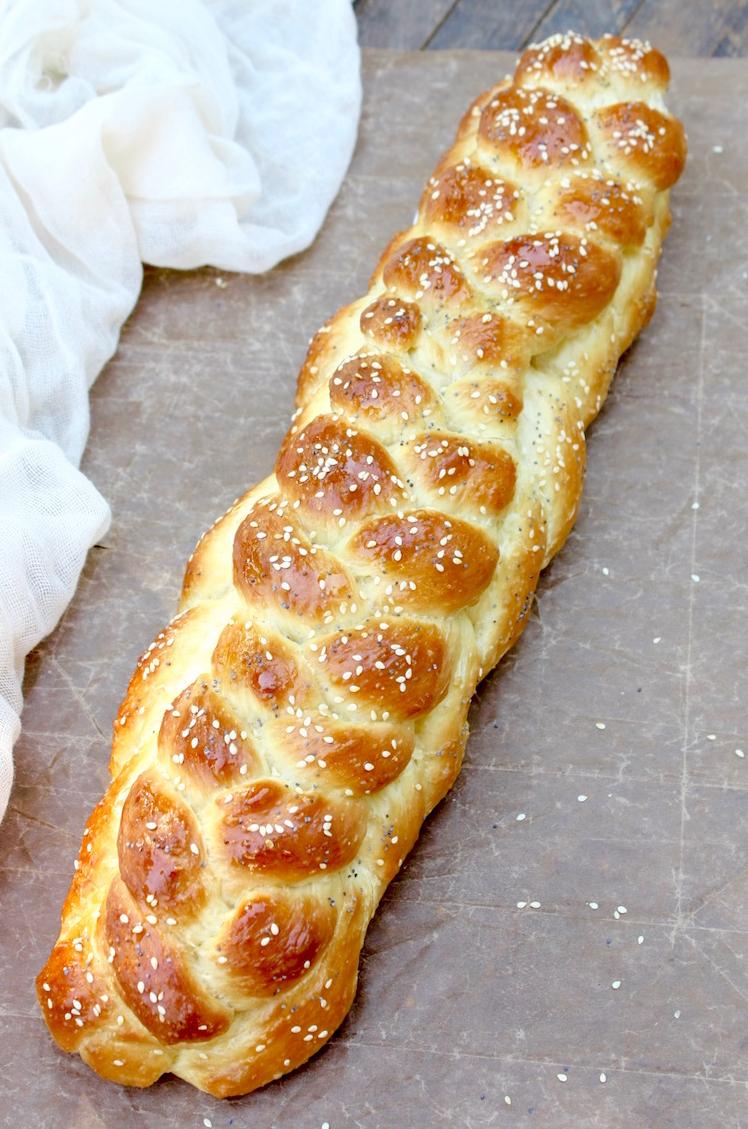
Now it’s time to shape the easy braid challah. First, I’ll divide the challah dough into six equal portions with a bench scraper or sharp knife. Then, using my hands or rolling-pin, I’ll form each portion into a long rope shape around 12-16 inches long.
Next, I’ll take three ropes and press them together at one end to secure them. Then I’ll braid the ropes like hair and tuck the other end under itself to create an even better presentation.
Alternatively, with four pieces of dough, we could create another braided pattern or even shape our challah into rounds or rolls.
Step Five: Second Rise and Glazing
Once shaped on my lined baking sheet or loaf pans (a non-stick liner/baking mat is recommended); brush them with beaten egg wash and let them rest for another hour (or up to overnight in the fridge) until they have doubled in size again.
Before baking in our preheated oven at 375 degrees Fahrenheit (350 degrees Fahrenheit if using convection oven) for about thirty-five minutes (internal bread temperature should be around 190 degrees Fahrenheit) make sure our Challah loaves are given an egg wash glaze with water so that they come out beautifully golden brown.
Congratulations! You now have some deliciously fresh homemade challah bread to share with your friends and family!
Substitutions and Variations
This recipe for Challah bread can be modified in a few ways to better suit your preferences or dietary needs. Here are some suggestions:
– Flours: While unbleached all-purpose flour is strongly recommended for this recipe, you can also try experimenting with different types of flour, such as whole wheat, rye, or spelt. Keep in mind that you may need to adjust the amount of liquid depending on the flour you use.
– Sweeteners: Instead of using sugar, you could substitute with honey, agave nectar, maple syrup, or stevia. Each sweetener will lend a unique flavor to your Challah bread.
– Toppings: The poppy seeds traditionally used as toppings can easily be swapped out for other kinds of seeds like sesame seeds or everything bagel seasoning. You could even go savory and sprinkle some flakey sea salt on top before baking.
– Braids: While the three-strand braid is the typical form for Challah dough, you could also attempt a four-strand braid for a twist on tradition. In fact, there are many kinds of braiding techniques that can elevate the appearance and texture of your Challah bread.
Just keep in mind that any substitutions may impact the final product. We recommend testing out small batches before committing to any major variations. Happy baking!
Serving and Pairing
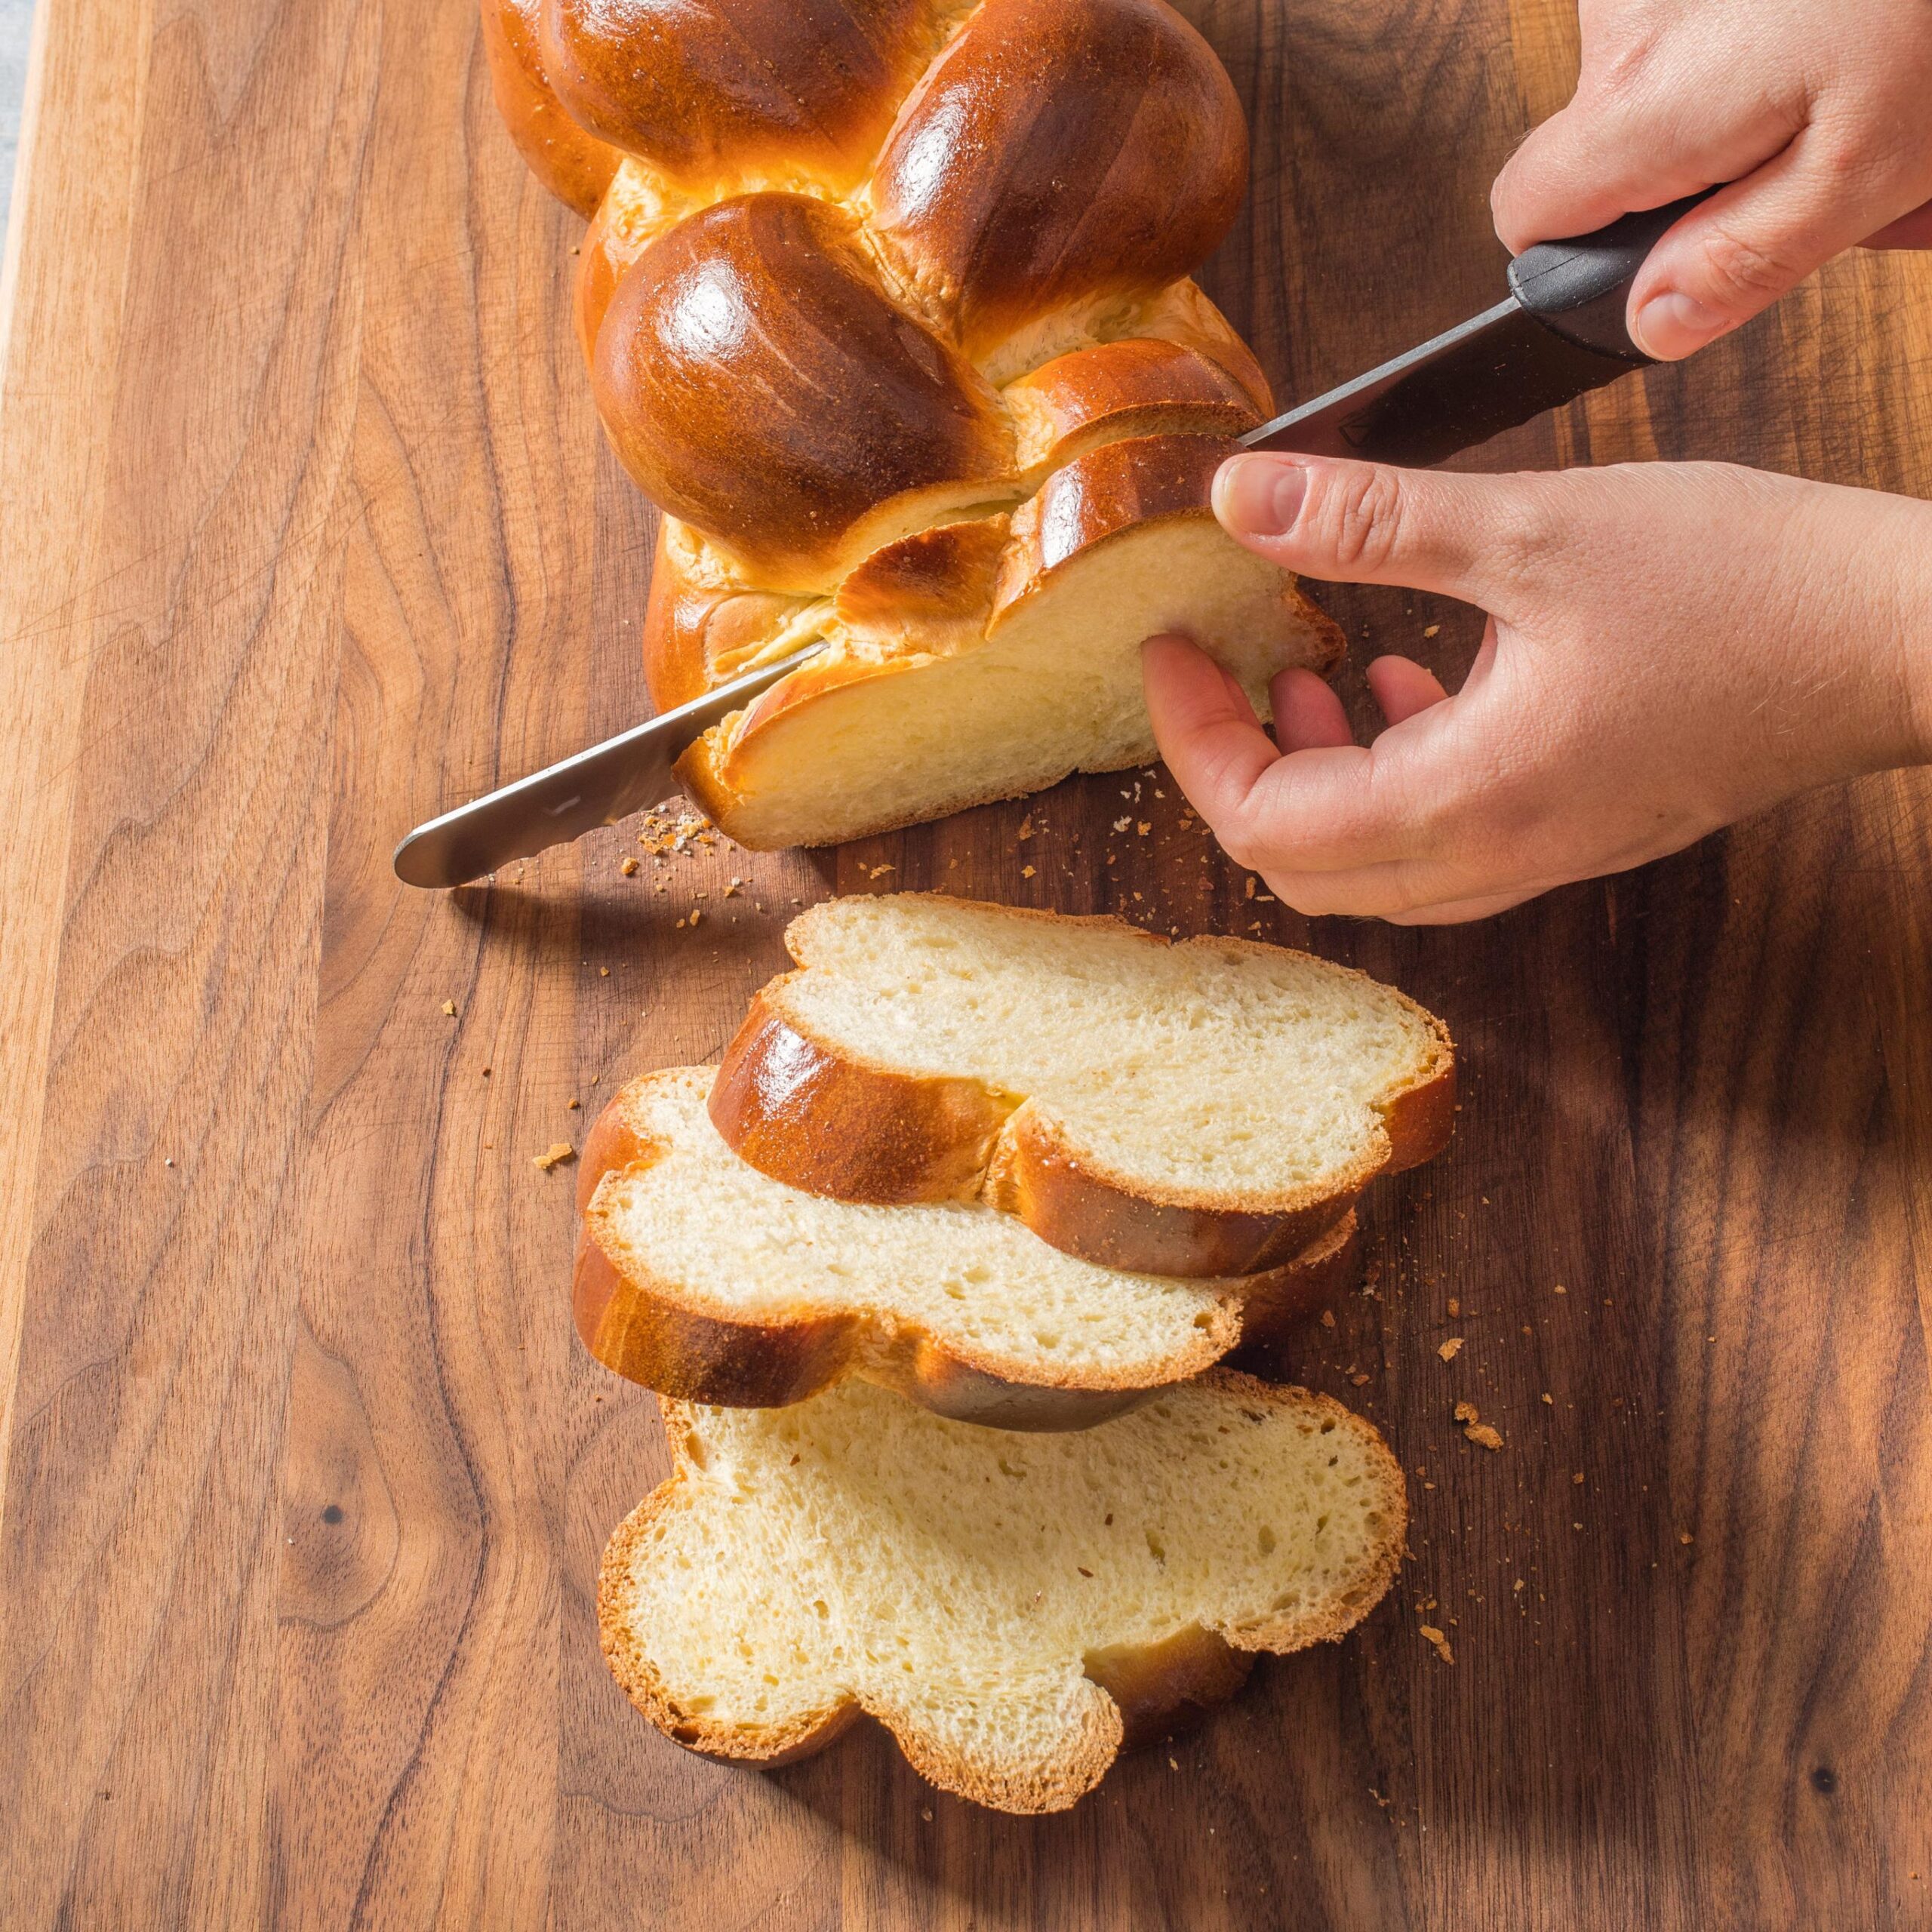
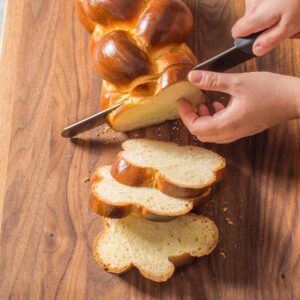
When it comes to serving and pairing this delicious Challah bread, there are plenty of options to choose from. One of the most popular ways to enjoy this bread is to simply slice it up and serve it with your favorite dip or spread. Cream cheese, hummus, or a homemade garlic butter are classic options that pair beautifully with this rich sweet bread.
If you’re looking for something more substantial, Challah makes excellent sandwiches. The soft yet sturdy texture of the bread can hold up well to hearty fillings like turkey, ham, or roast beef. You can even grill the sliced Challah bread for a crunchy texture that pairs perfectly with the gooey melted cheese.
Another great idea is to turn your Challah bread into French toast. The recipe’s egg yolks make this bread incredibly rich and absorbent, perfect for soaking in a custard mixture of eggs, milk, and vanilla extract. Once cooked in a frying pan, you can top your French toast with fresh berries, whipped cream, and a drizzle of maple syrup for a decadent breakfast or brunch option.
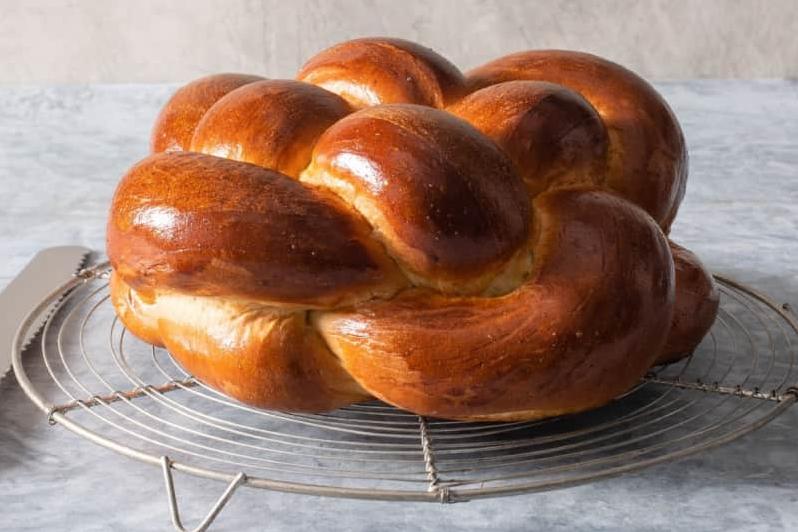
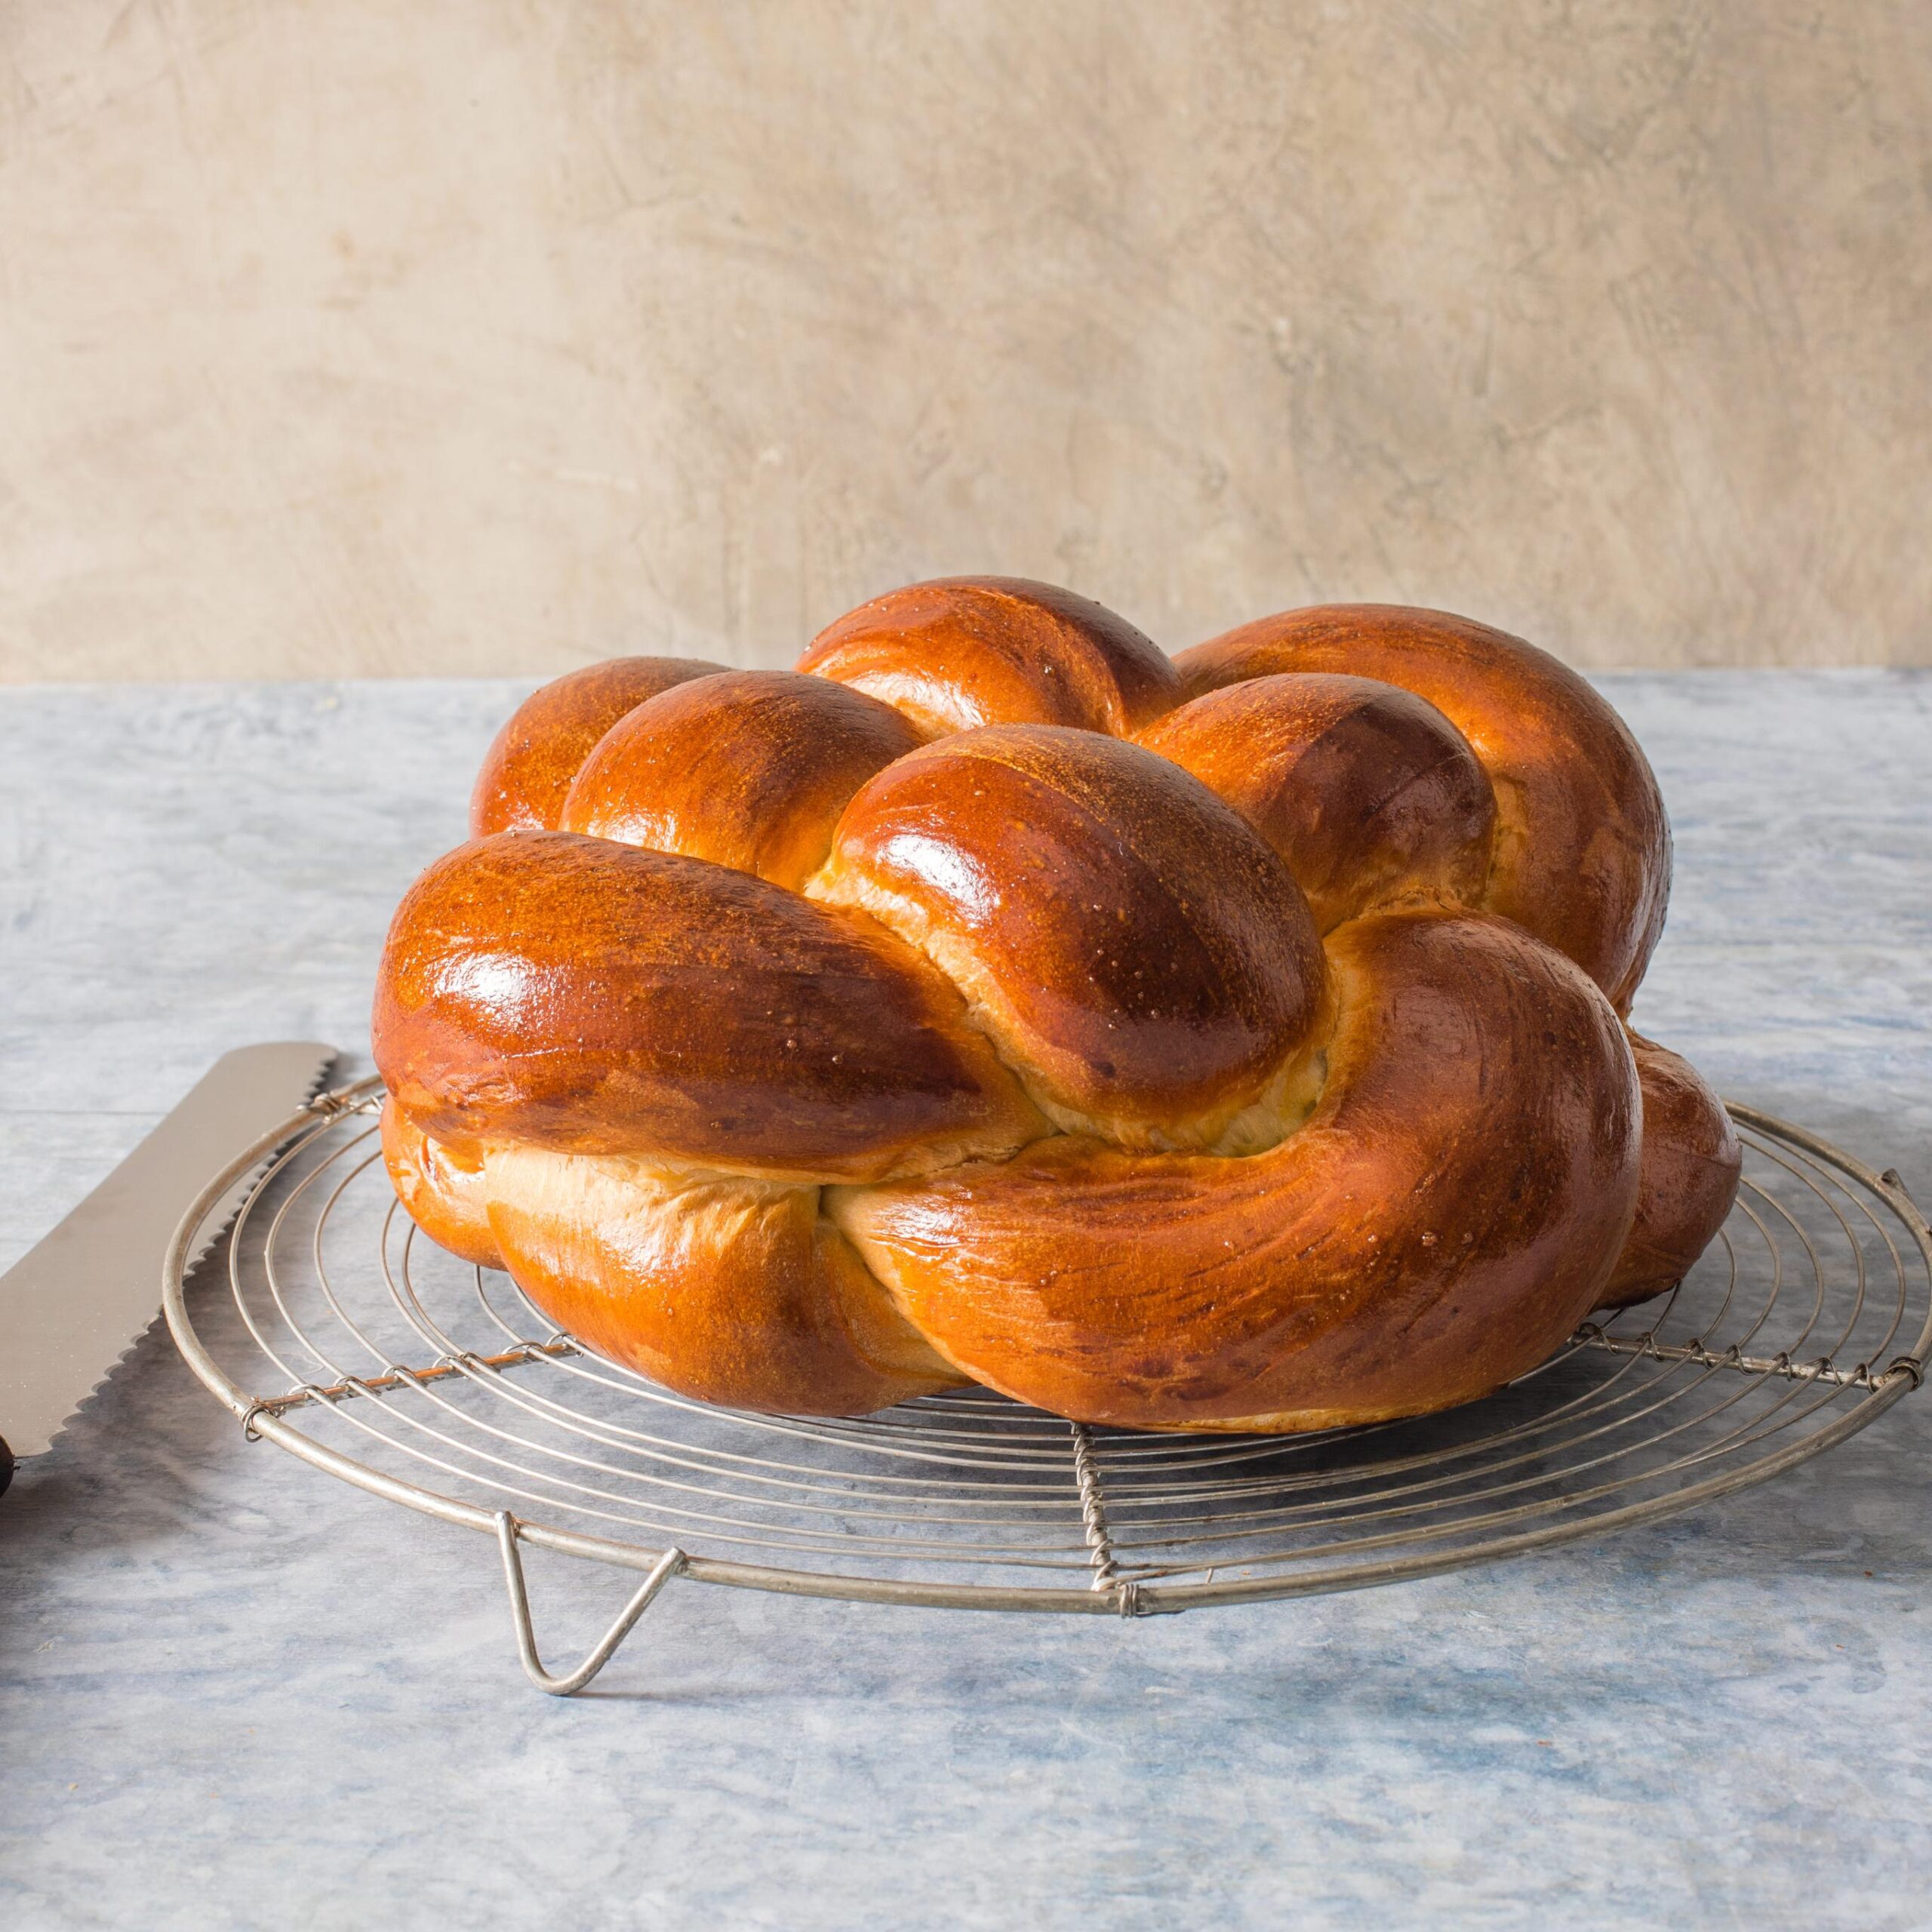
For more special occasions, you can try serving a whole round Challah bread as an impressive centerpiece at your table. This braided Challah bread is iconic on the Jewish Sabbath or holidays but works well for any festive occasion. You can even make smaller Challah rolls, perfect for sharing around a dinner party table.
No matter how you choose to serve or pair your Challah bread, one thing is guaranteed – it will be a crowd-pleaser among all ages and tastes.
Make-Ahead, Storing and Reheating
One of the best things about this challah recipe is that it can be made ahead of time, making it perfect for any occasion. If you’re planning to serve it for a special occasion, you can make the dough and let it rise before shaping it into a braid. Once you have your braid, cover it loosely in plastic wrap and refrigerate it overnight. This way, you can have fresh-baked challah bread in a matter of minutes the next day.
Storing challah bread is quite easy and simple, as well. Simply keep it in an airtight container on your kitchen counter or in the fridge. The bread will stay fresh for up to 3-4 days when properly stored.
If you need to reheat your challah bread, do so in an oven preheated to 350°F (175°C) for 5-7 minutes. This will give your bread new life and make it taste fresh out of the oven again.
Another option for reheating is to slice the loaf and toast individual pieces in a toaster or under a broiler until toasted and crispy.
With these great make-ahead, storing, and reheating tips under your belt, you’re sure to always have a delicious loaf of challah bread on hand!
Tips for Perfect Results
To ensure a successful outcome with this recipe, here are some expert tips to consider:
– One of the keys to achieving the perfect texture for this Challah recipe is using unbleached all-purpose flour rather than bleached flour. Bleached flour has lower protein content, which can result in a weaker structure of the bread.
– Don’t rush the rising process. This recipe already includes a generous amount of yeast, so if you need to speed up the proofing process, do so by placing the dough in a warm environment rather than relying on additional yeast.
– When braiding the dough, make sure that you don’t braid it too tightly as doing so can prevent it from rising fully during baking. The braid should be loose but still have definition.
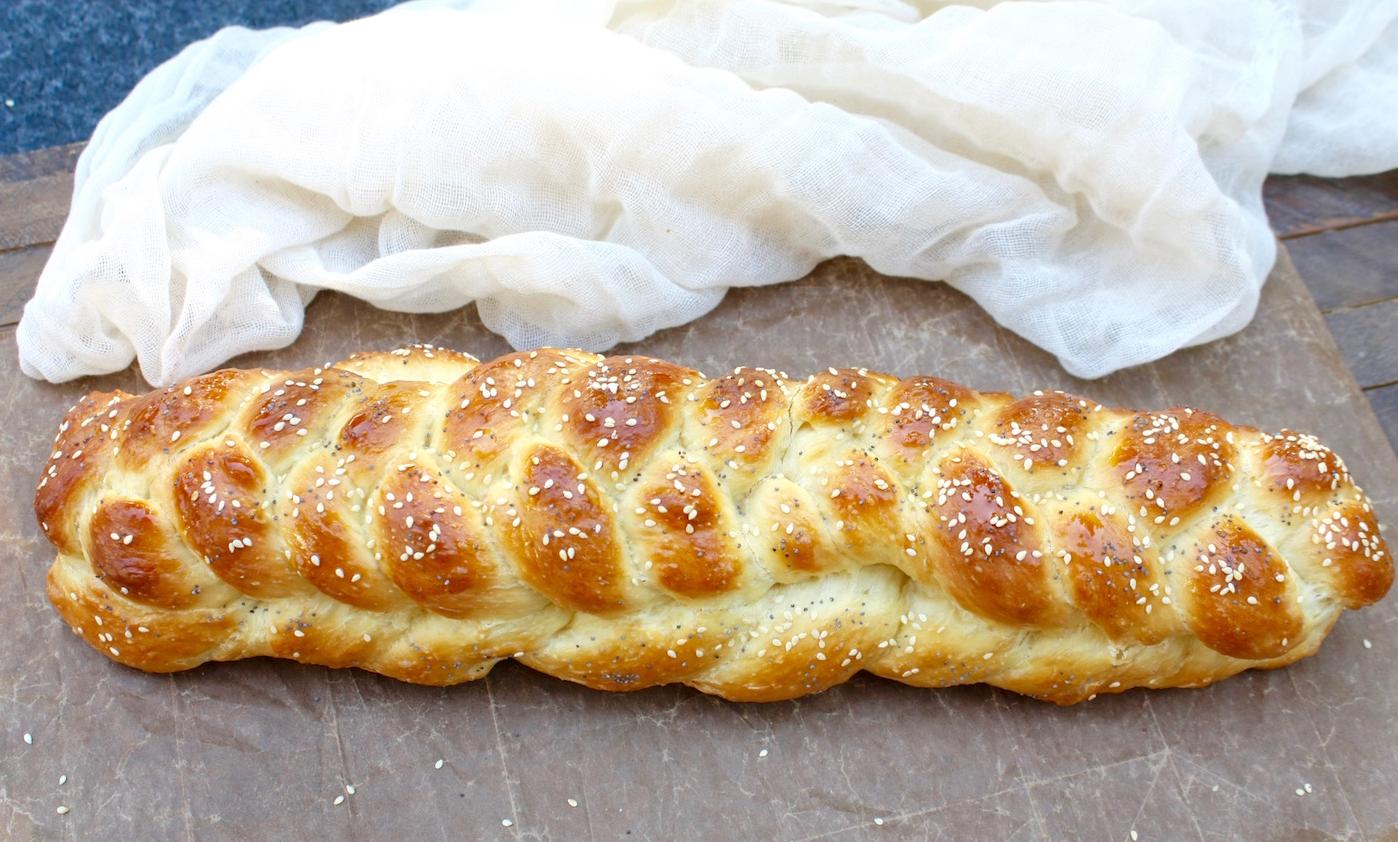
– If you want to add a little extra flavor to your Challah, sprinkle some poppy seeds on top before baking. This will give your Challah an added crunch and a unique taste.
– When shaping rounds or rolls from the dough, use flour on your hands and work surface to prevent sticking. You can also experiment with different shapes including round challah or even challah rolls.
– Follow the recipe instructions for adding salt precisely. Salt not only adds flavor to your bread but also plays an important role in developing structure while inhibiting overgrowth of yeasts and bacteria.
– Once your Challah is finished baking and has cooled down, store it in an airtight container or bag at room temperature for up to 3 days. If you refrigerate it, be sure to bring it back up to room temperature before serving.
– If you have any leftover Challah or find yourself unable to finish a whole loaf, consider using it for French toast. The rich sweet and eggy flavor of this bread makes for unforgettable French toast that will leave your family begging for more.
By following these simple tips and experimenting with variations, you should be able to create your favorite Challah bread recipe with confidence just like we did at Cook’s Illustrated.
Bottom Line
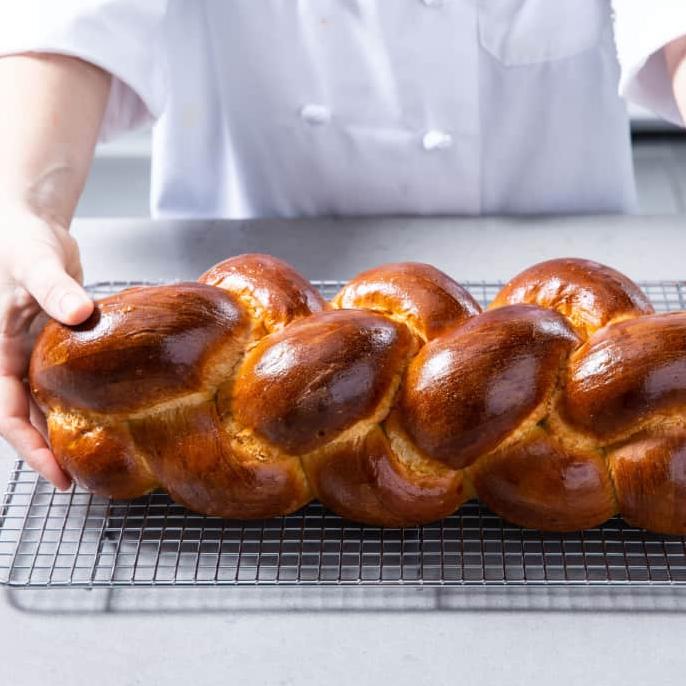
In conclusion, this Challah recipe from Cook’s Illustrated is really something special. With its rich flavor and beautiful braided appearance, it’s no wonder that Challah is such a beloved bread around the world. I encourage you to try this recipe at home and experience the magic of a soft, warm Challah fresh from your own oven.
Remember, if you’re looking for a versatile and delicious bread that can stand alone or enhance any meal, look no further than Challah. With its soft, airy texture and irresistible sweet taste, Challah is sure to become a staple in your home.
So go ahead and try this recipe for yourself. Experiment with different braiding techniques and toppings like poppy seeds to make it your own. Trust me, once you give this easy-to-follow Challah recipe a try, you’ll understand why it’s been a favorite for generations.
Happy baking!
Challah(Cook’s Illustrated) Recipe
Ingredients
- 3 -3 1/4 cups unbleached all-purpose flour, plus more for dusting work surface (15-16 1/4 ounces)
- 1/4 cup sugar (1 3/4 ounces)
- 2 1/4 teaspoons instant yeast (1 envelope)
- 1 1/4 teaspoons salt
- 2 large eggs
- 1 large egg yolk
- 4 tablespoons unsalted butter, melted (1/2 stick)
- 1/2 cup plus 1 tablespoon warm water (about 110 degrees)
- 1 large egg white (for wash)
- 1 teaspoon poppy seeds (optional) or 1 teaspoon sesame (optional)
Instructions
- Whisk together 3 cups of flour, sugar, yeast, and salt in medium bowl; set aside. Mix together 2 eggs, egg yolk, melted butter, and 1/2 cup of water in bowl of standing mixer fitted with dough hook. Add flour mixture to wet mixture; knead at low speed until dough ball forms, about 5 minutes, adding remaining 1/4 cup flour, 1 tablespoon at a time, as needed to prevent dough from sticking. Whisk reserved egg white with remaining 1 tablespoon water in small bowl, cover with plastic wrap, and refrigerate.
- 2. Transfer dough to very lightly oiled large bowl, turning dough over to coat with oil. Cover with plastic wrap and let rise in warm place until doubled in size, 1 1/2 to 2 hours. Gently press dough to deflate, cover with plastic wrap, and let rise until doubled in size again, 40 to 60 minutes.
- 3. Lightly grease large baking sheet and set aside. Transfer dough to lightly floured work surface. Divide dough into 2 pieces, one roughly half size of other. (Small piece will weigh about 9 ounces, larger piece about 18 ounces.) Divide large piece into 3 equal pieces. Roll each piece into 16-inch-long rope, about 1 inch in diameter. Line up ropes of dough side by side and pinch ends together. Take dough rope on bottom and lay it over center rope. Take dough rope on top and lay it over center rope. Repeat until ropes of dough are entirely braided, then pinch ends together. Place braid on baking sheet. Divide smaller piece of dough into 3 equal pieces. Roll each piece into 16-inch-long rope, about 1/2 inch in diameter. Braid together, pinching ends to seal. Brush some of egg wash on top of large loaf and place small braid on larger braid. Loosely drape loaf with plastic wrap and let rise in warm place until loaf becomes puffy and increases in size by a third, 30 to 45 minutes.
- 4. Adjust oven rack to lower-middle position and heat oven to 375 degrees. Brush loaf with remaining egg wash and sprinkle with poppy or sesame seeds, if using. Bake until loaf is golden brown and instant-read thermometer inserted into side of loaf reads 190 degrees, 30 to 40 minutes. Place baking sheet on wire rack. Cool loaf completely before slicing.