Delicious Challah Recipe for Your Next Shabbat Meal
The art of bread making is a time-honored tradition that has been passed down through generations. And among the various types of bread, Challah has undoubtedly emerged as one of the most cherished and beloved throughout the Jewish community.
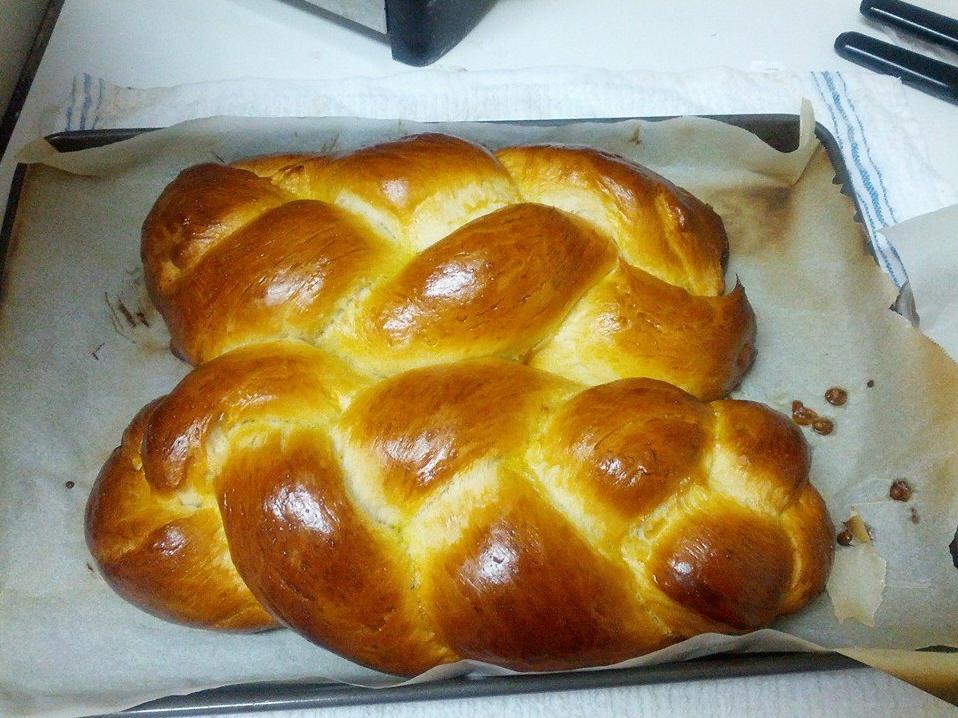
Challah bread is a beautiful, braided loaf enriched with eggs, sugar, and oil. It’s often enjoyed on Shabbat and holidays but can be savoured on any day of the week. With a pillowy interior and a golden crust, challah is not just any bread, it’s an experience.
And today, I am excited to share with you my version of the Famous Challah Recipe that I’ve perfected over the years as an Israeli chef. My recipe incorporates a few twists that guarantee top-notch results every time. So let’s roll up our sleeves, put on our aprons and get baking!
But before we dive into how to make this delicious bread, let’s first delve into why you’ll love this recipe so much.
Why You’ll Love This Recipe
Looking for a delicious bread recipe that’s perfect for family gatherings, potluck dinners, or even just treating yourself? Look no further than this famous Challah recipe! This scrumptious bread boasts a rich and fluffy texture that’s perfect for enjoying on its own, as well as for pairing with all sorts of sweet or savory toppings.
What makes this original recipe so special? For starters, it’s loaded with high-quality ingredients, including warm water, sugar, salt, eggs, dry yeast, and all-purpose flour. Each component is carefully measured and mixed to produce the perfect balance of flavors and textures.
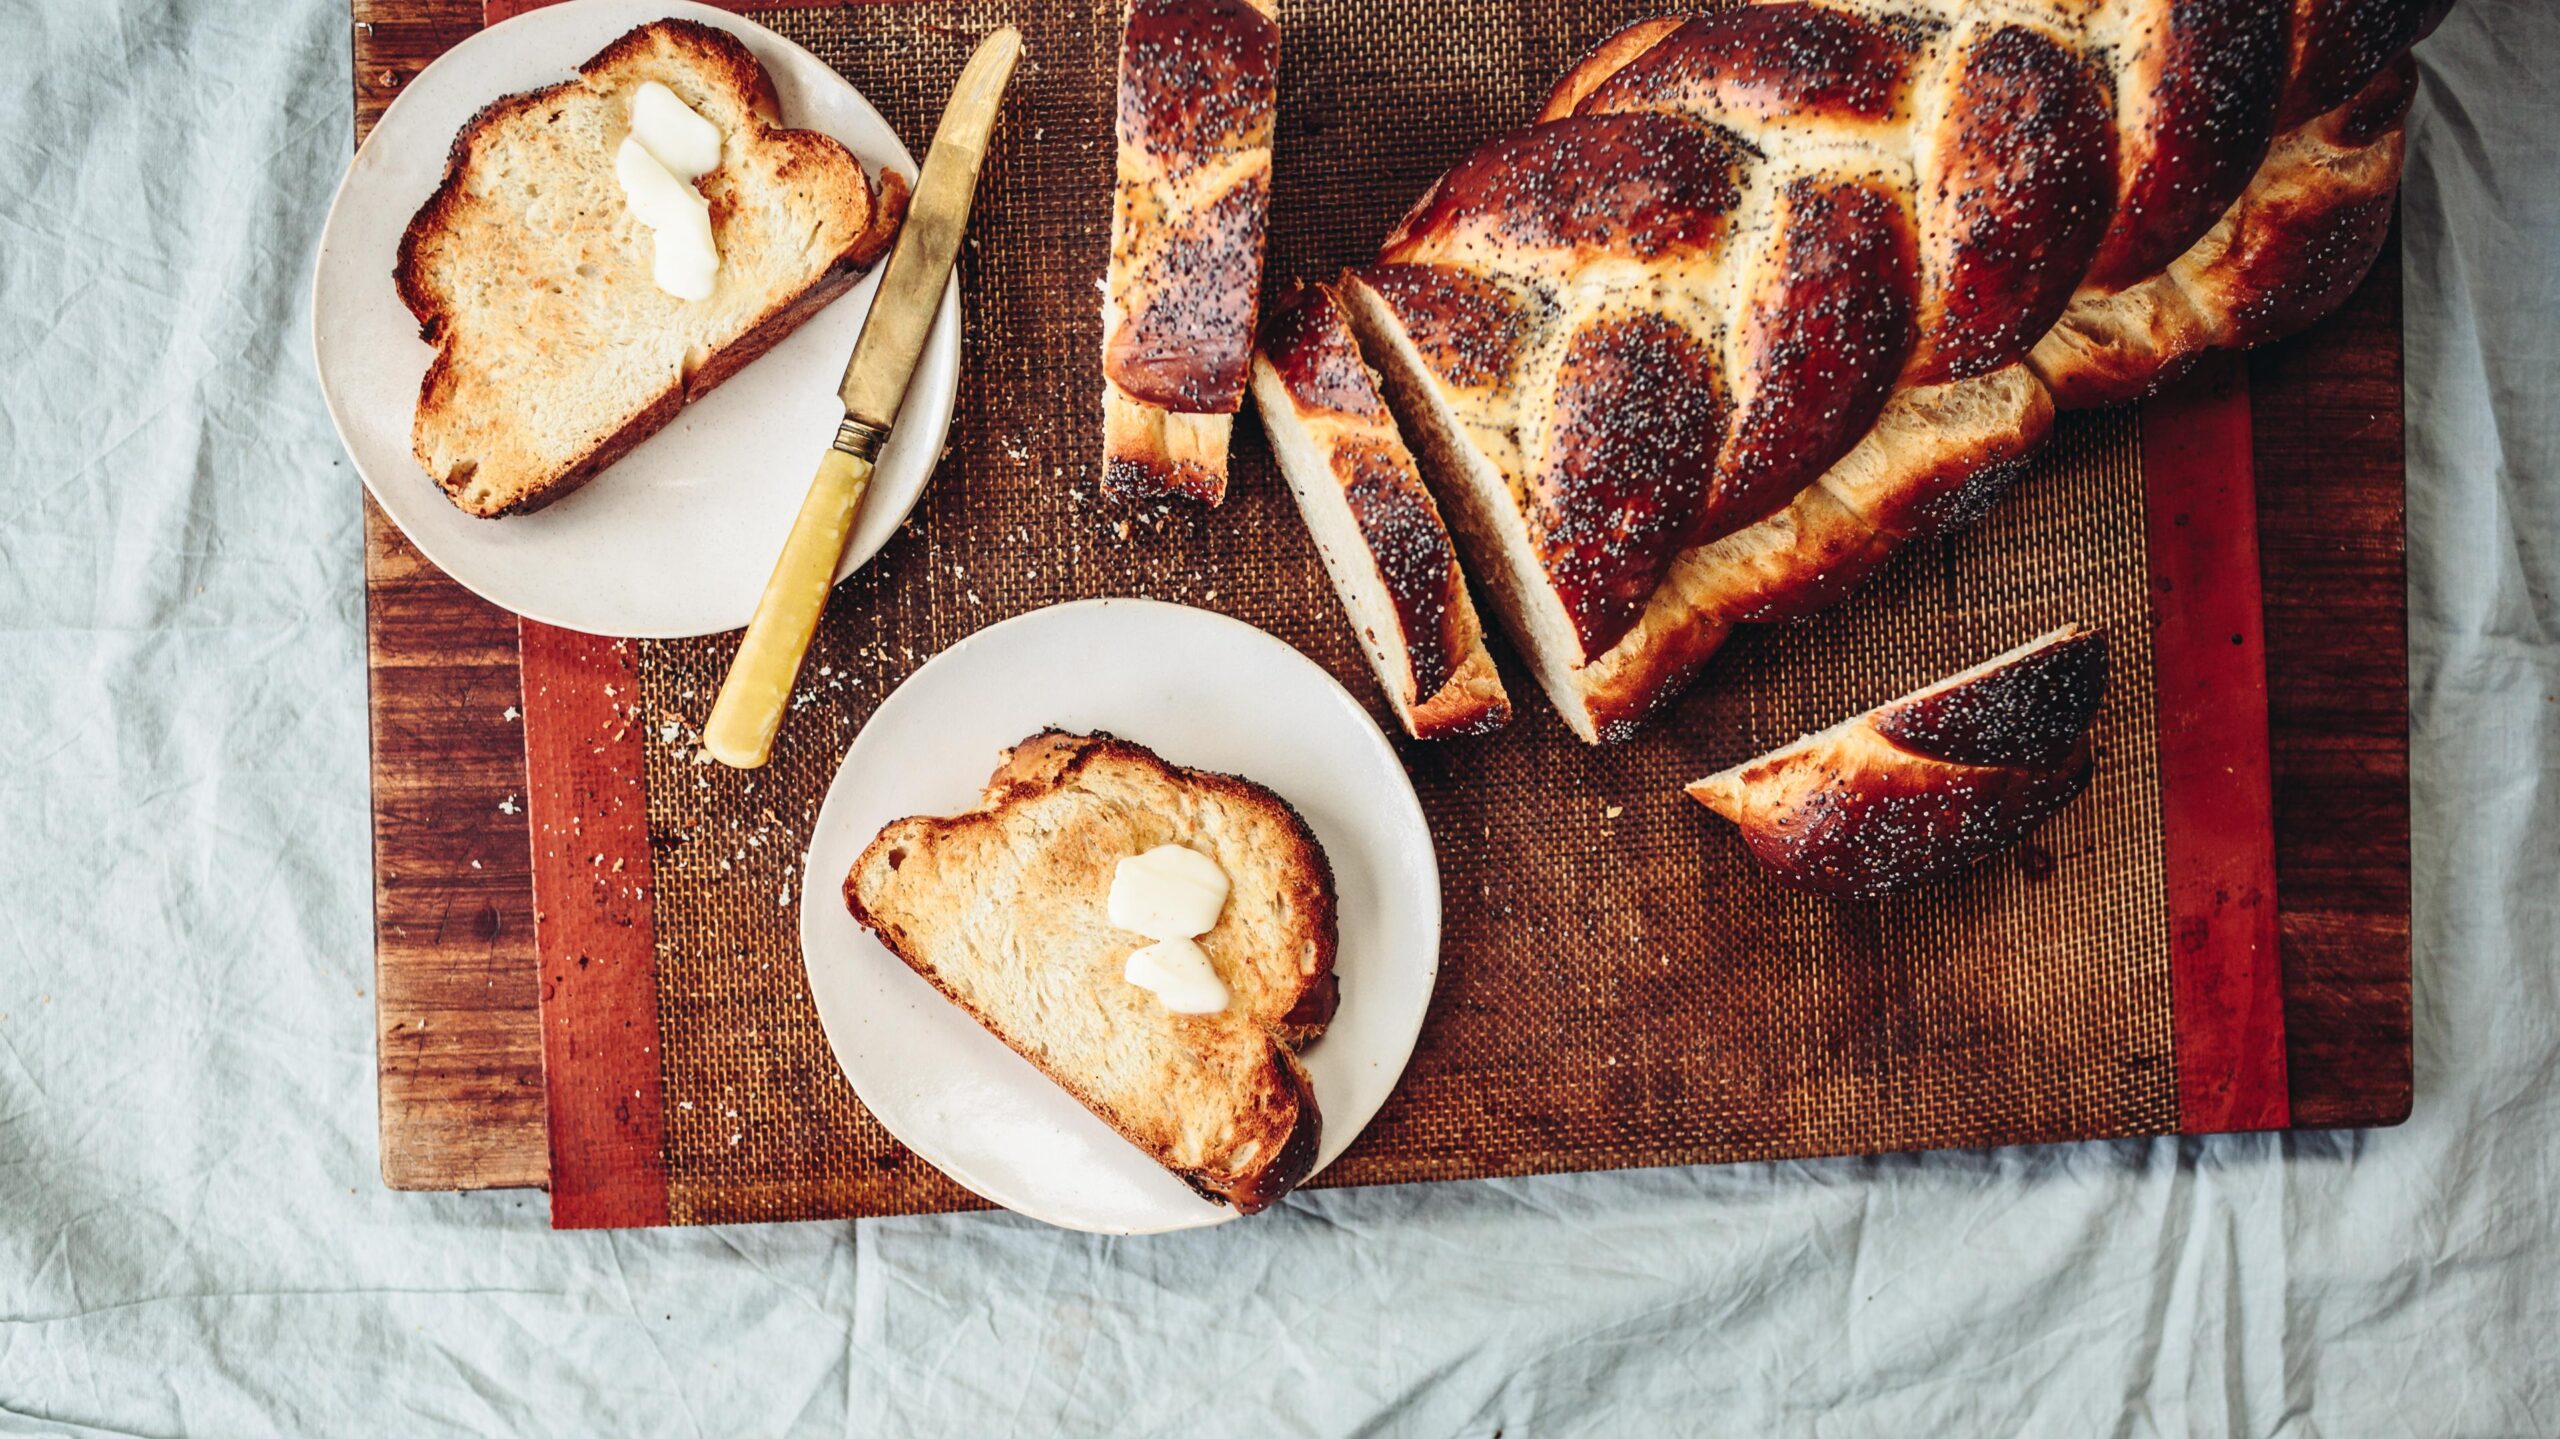
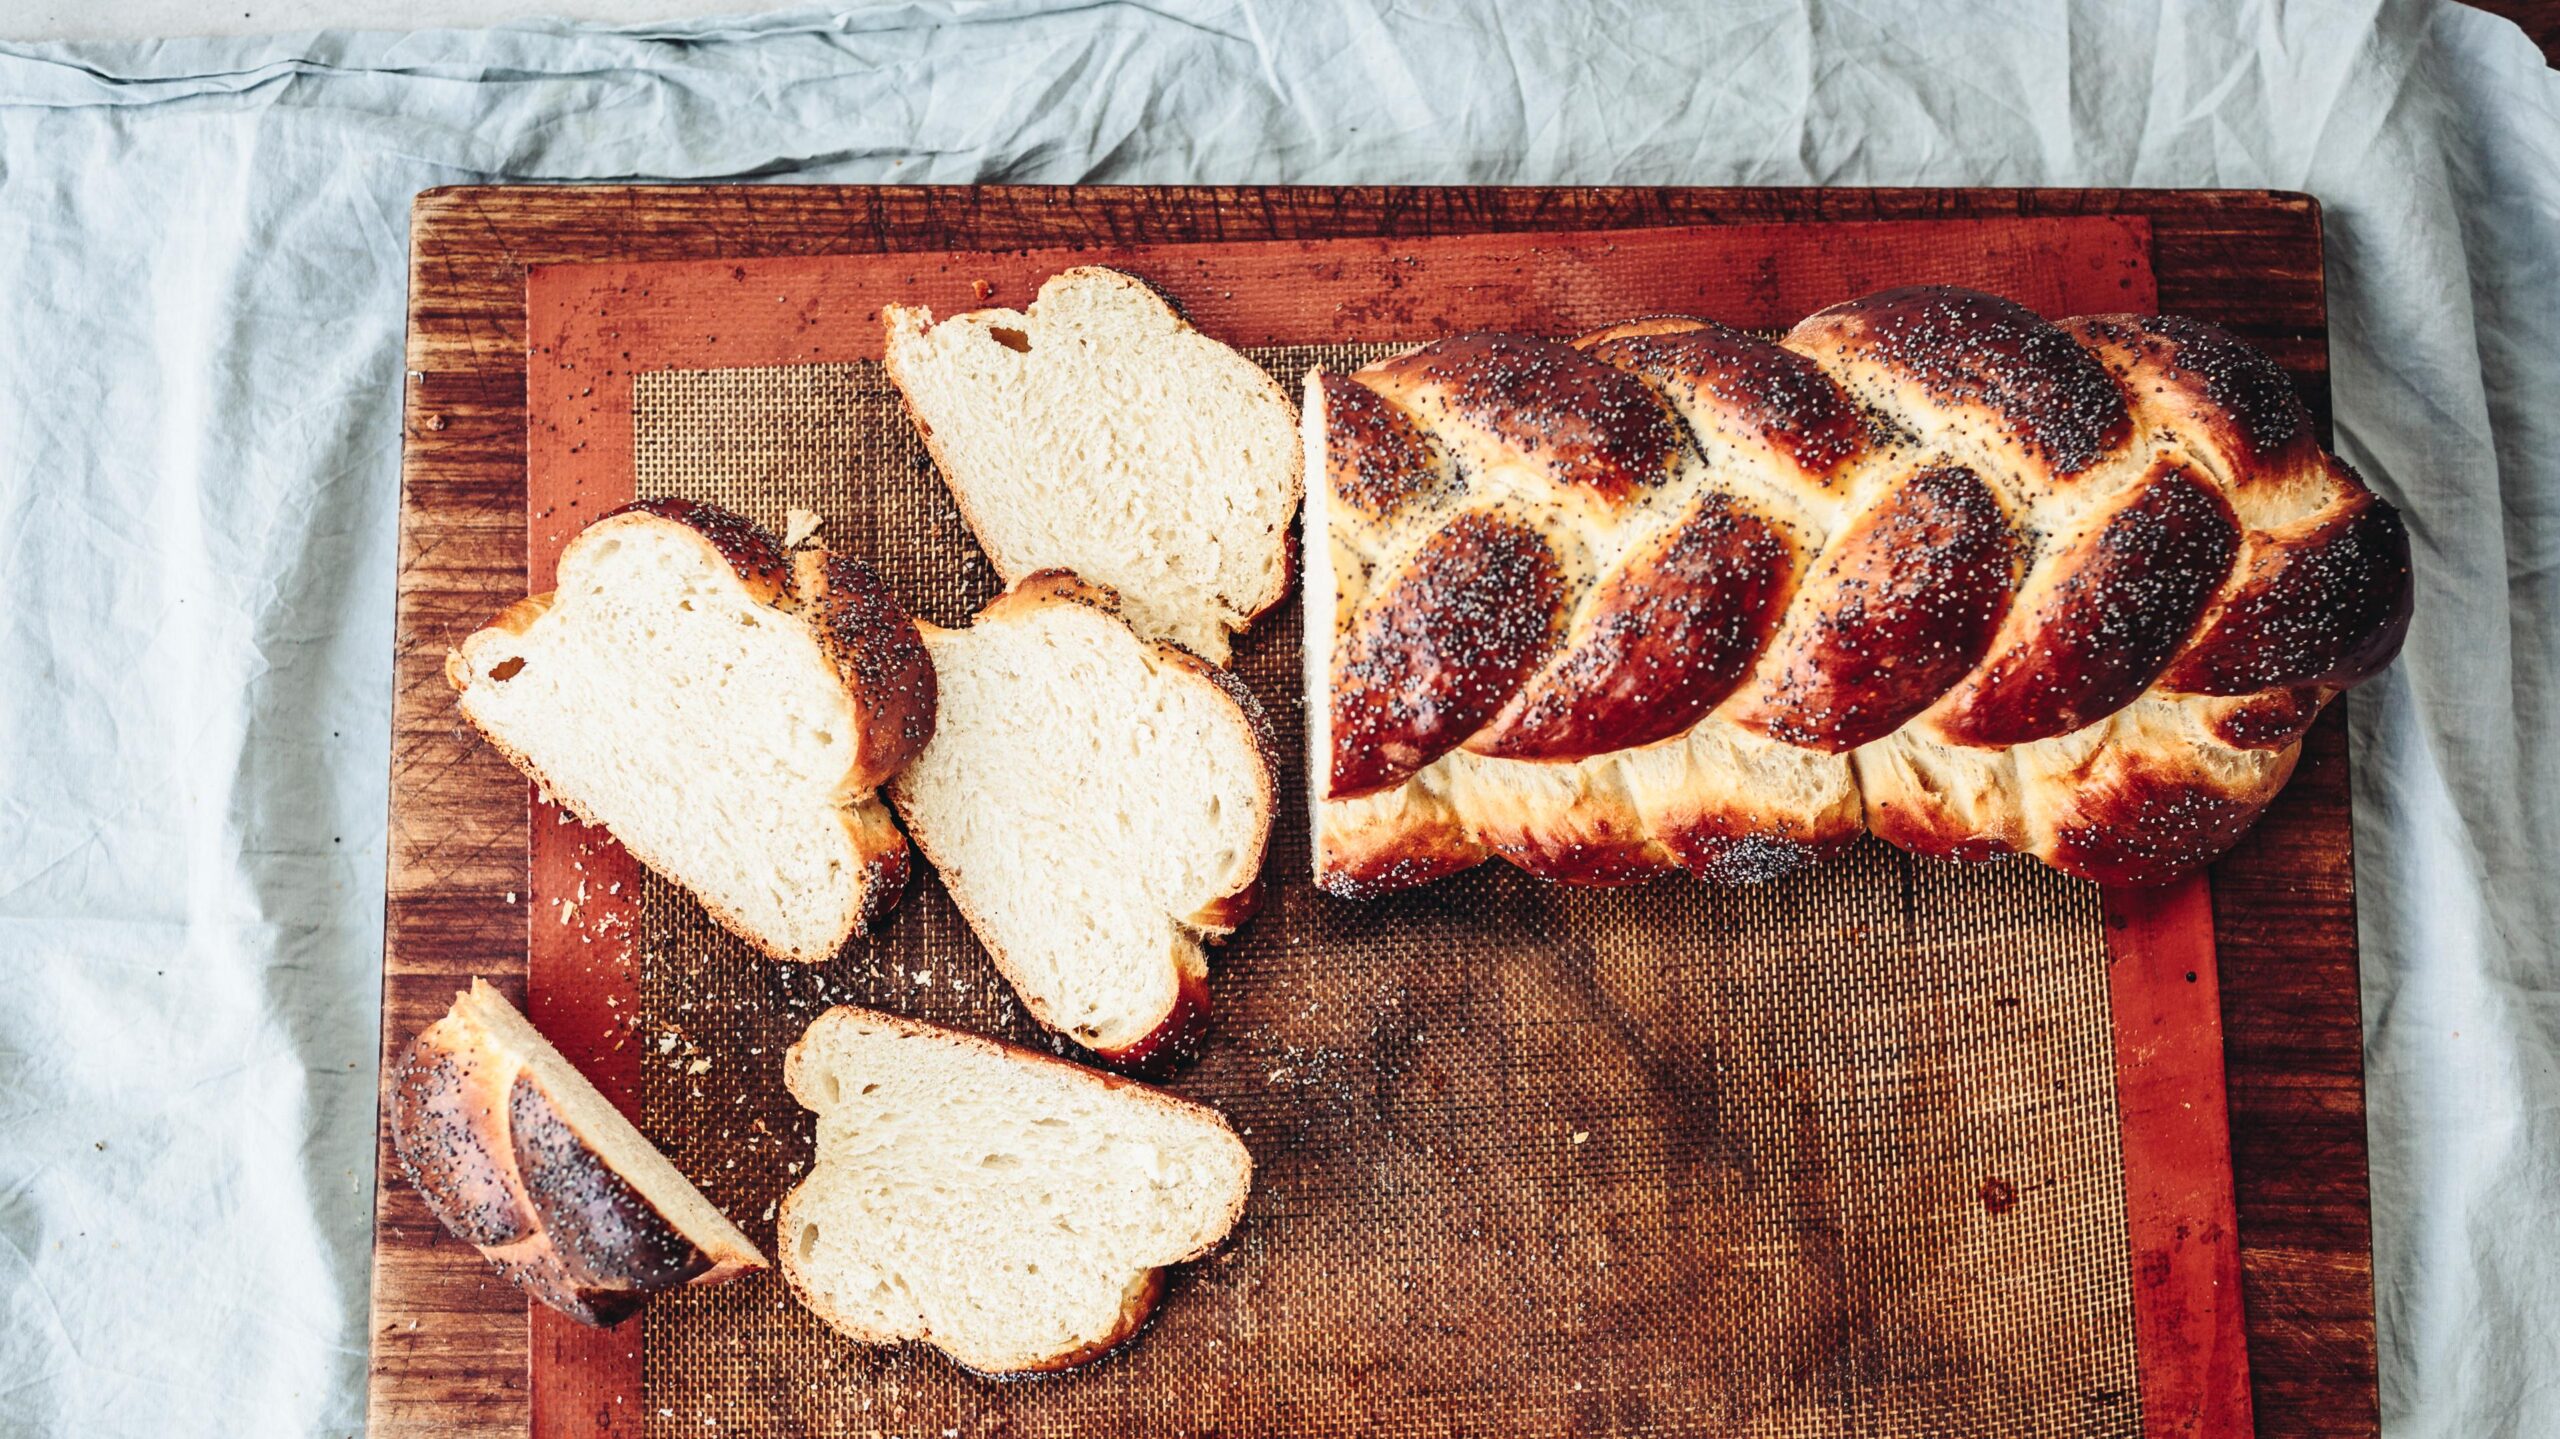
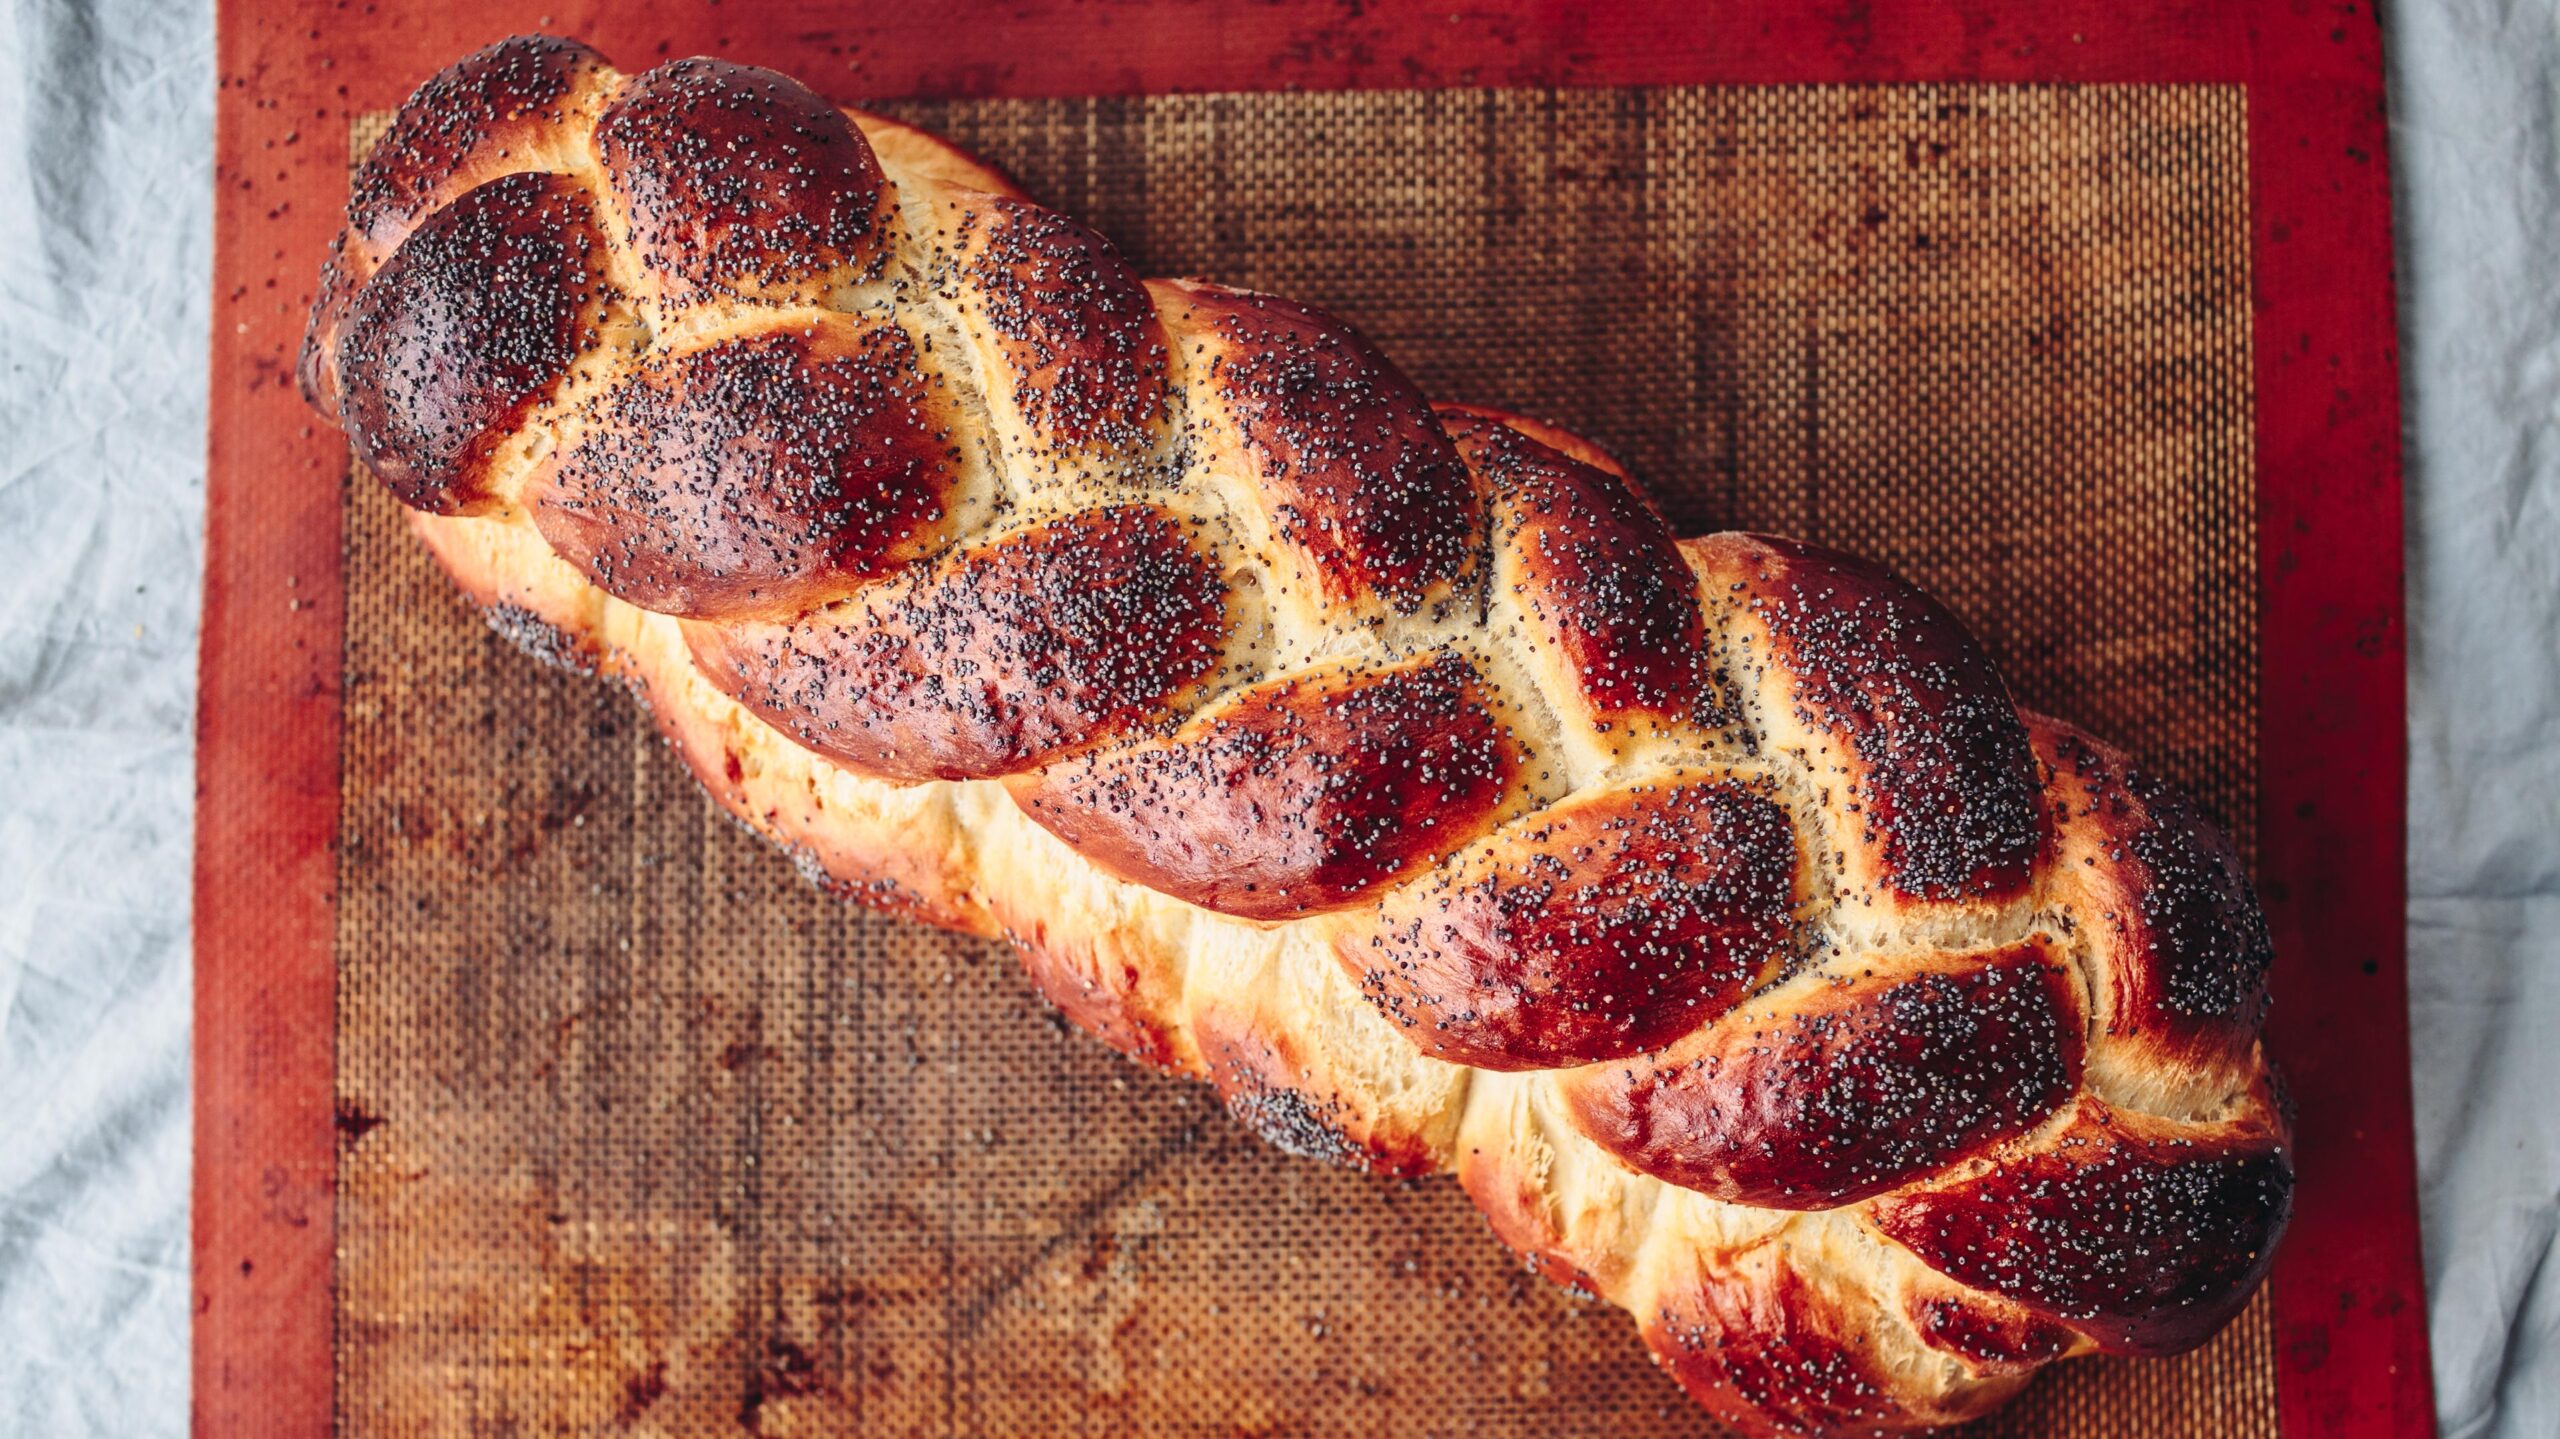
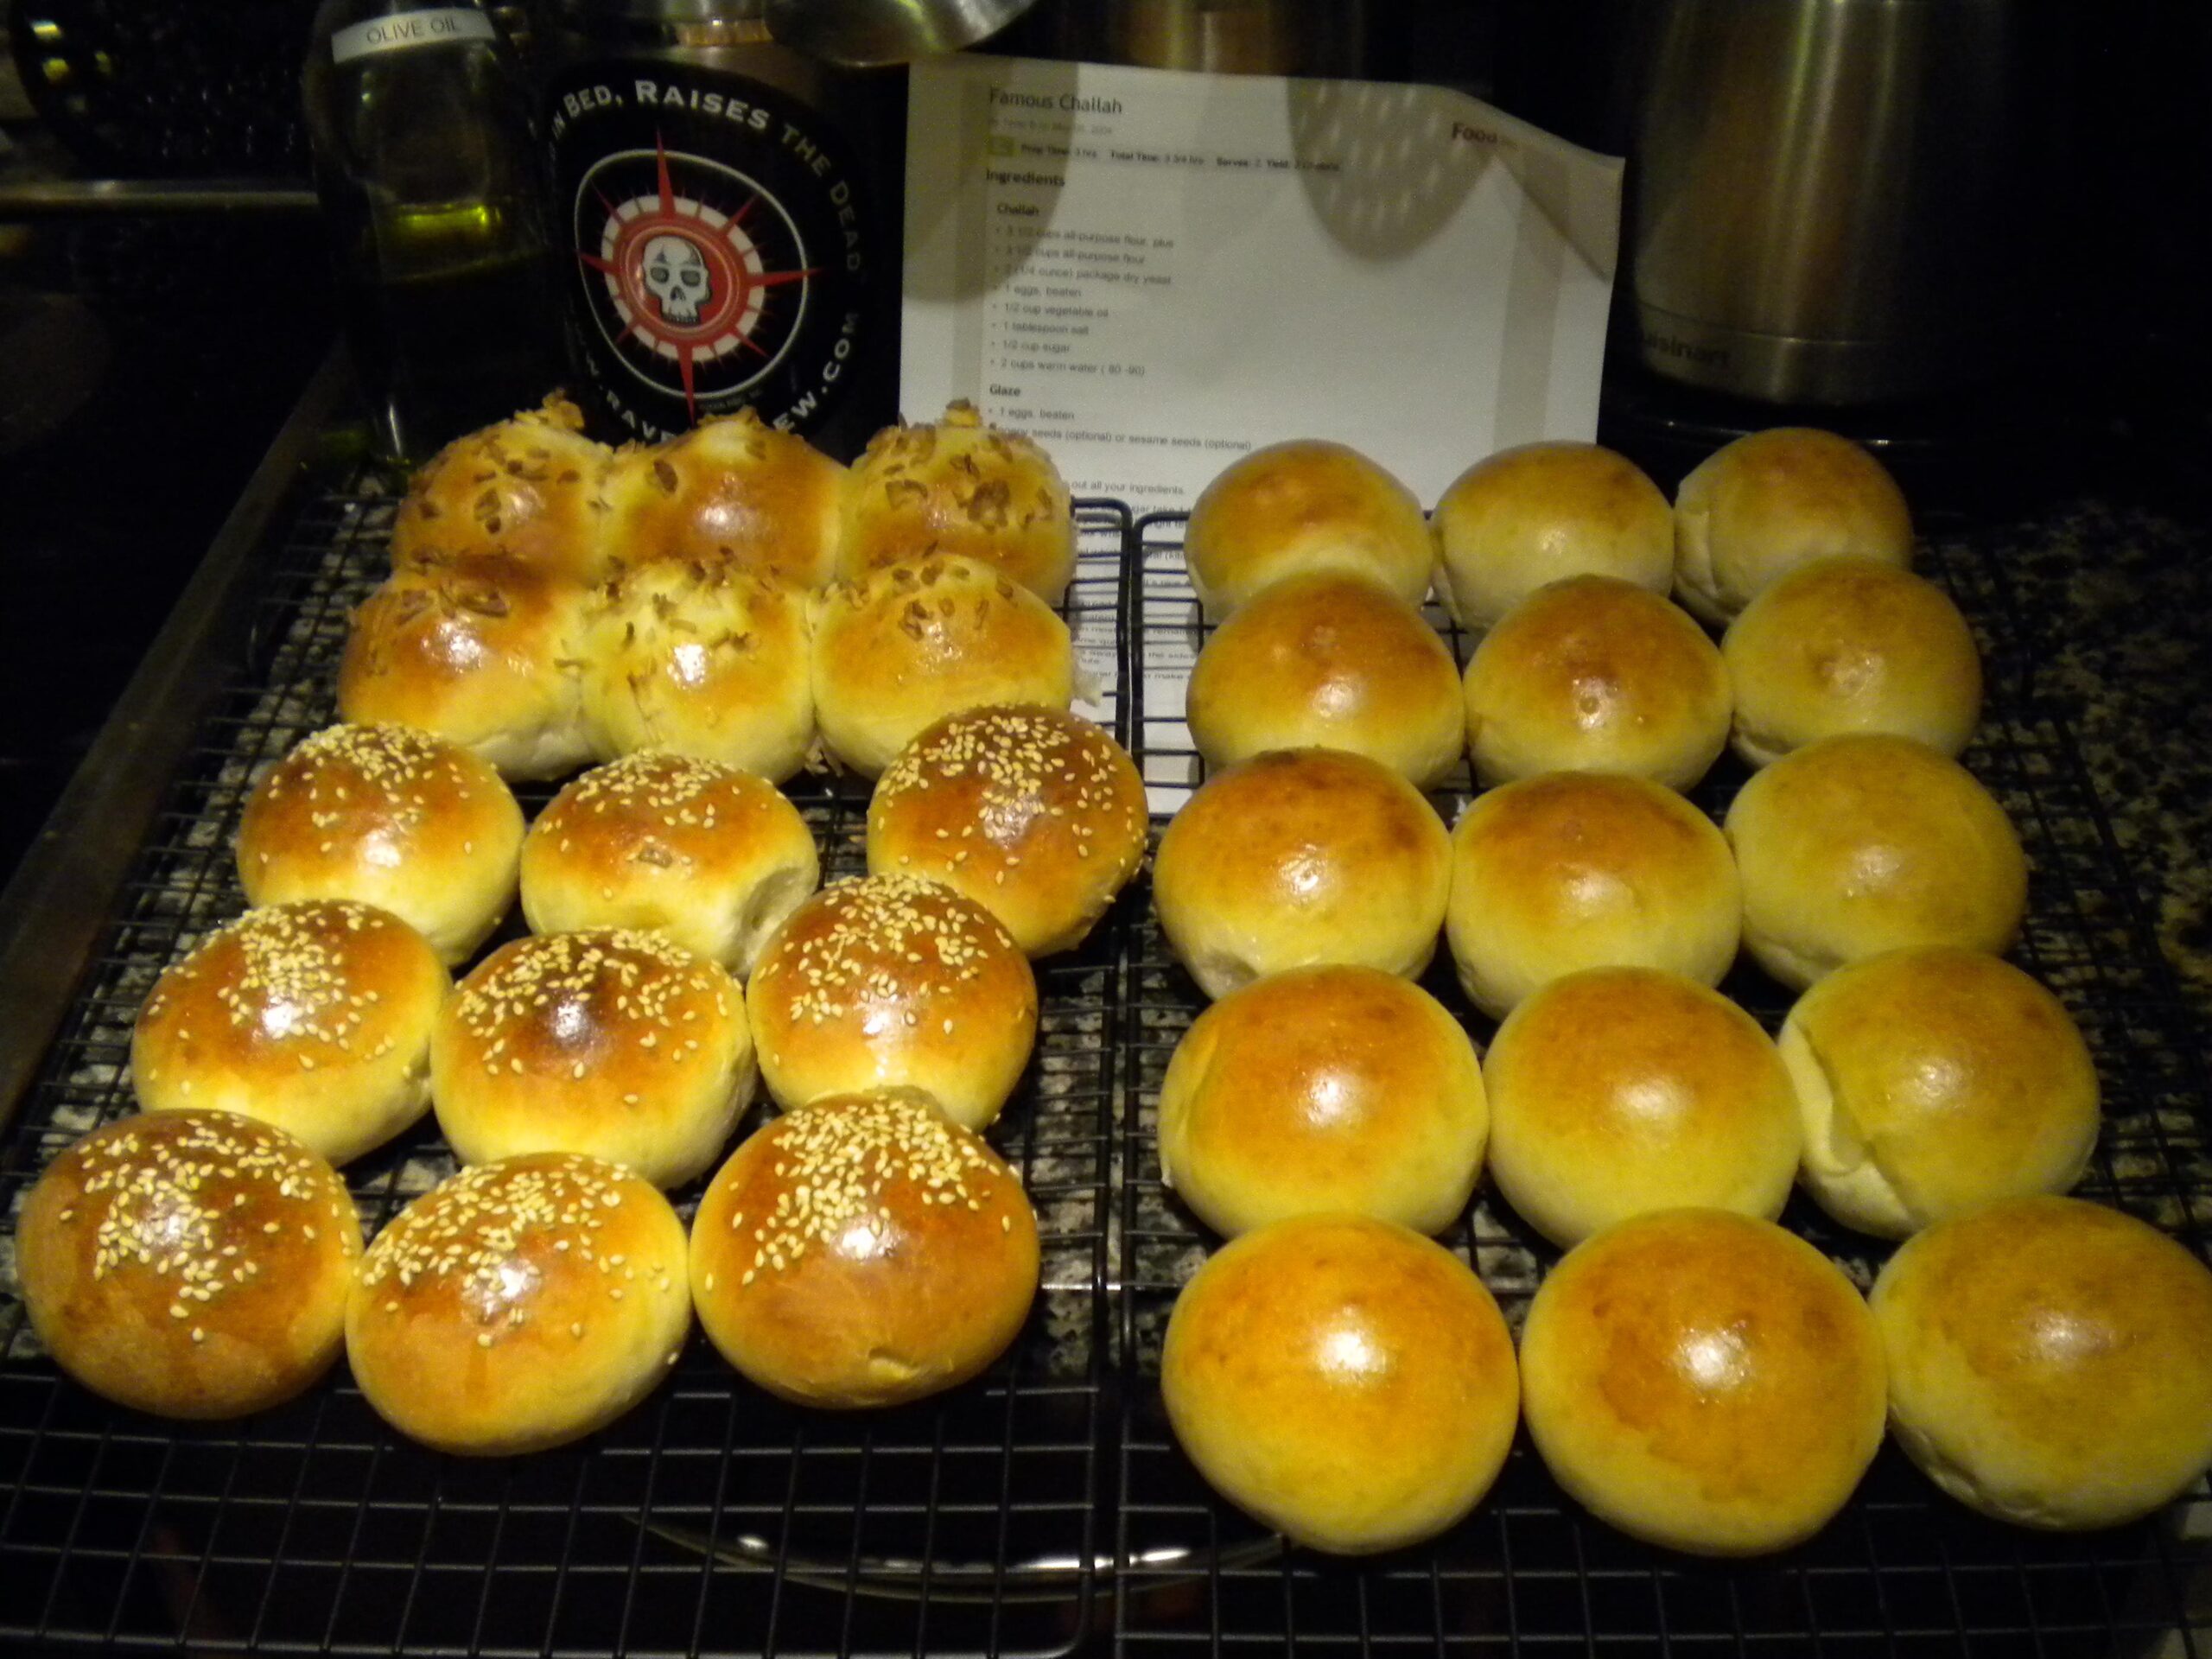
But what really sets this famous Challah recipe apart is its versatility. You can customize your Challah by adding poppy seeds or sesame seeds to the top before baking or even braiding it in unique patterns before they pop in the oven. You can also experiment with different serving suggestions based on your taste preferences.
Whether you’re feeling indulgent and want to slather it with butter and jam or want to keep it simple by dipping it in olive oil, this bread is sure to satisfy every craving. It’s no surprise some of the most accomplished chefs in Israel have perfected their variations of this beloved dish.
So why not roll up your sleeves and give this famous Challah recipe a try today? Your taste buds will thank you!
Ingredient List
What traditional ingredients make a delicious Challah bread?
Challah is an egg bread that has been enjoyed in Jewish households for generations. It’s typically eaten on the Sabbath and holidays, but it’s so delicious that it can be enjoyed any day of the week. To make this Famous Challah Recipe, you’ll need a list of ingredients that are easy to find at your local grocery store.
The Ingredients You’ll Need Are:
- 2 packages active dry yeast
- 1 cup sugar
- 6 cups all-purpose flour
- 2 tablespoons salt
- 2 eggs
- 3 tablespoons vegetable oil
- 2 cups warm water
In addition to these items, you can also choose to add poppy seeds or sesame seeds to sprinkle on top of the challah once it’s braided. The seeds serve as a nice finishing touch and add a little texture to the bread.
Note: For best results, make sure all your ingredients are at room temperature before starting the recipe.
The Recipe How-To
Step 1: Mixing the Dough
1. In a large bowl, dissolve 1 and 1/2 tablespoon of dry yeast and 2 tablespoons sugar in 2 cups of warm water.
2. Wait for the mixture to start forming bubbles.
3. Add 6 cups of all-purpose flour, 3 eggs beaten, and 3 tablespoons vegetable oil into the bowl and mix well.
Step 2: Kneading the Dough
1. Once the dough comes together roughly, it’s time for kneading.
2. To do this, sprinkle the work surface with some flour and put the dough on top of it.
3. Knead the dough until it becomes smooth and elastic. This will take roughly ten minutes and needs around 1-2 cups of additional flour.
Step 3: Letting the Dough Rise
1. Grease a large bowl with some vegetable oil or cooking spray.
2. Put the kneaded dough in this bowl and coat it well with oil.
3. Cover it with a damp cloth or plastic wrap and let it rise until it doubles its size; this takes about an hour or longer.
Step 4: Shaping The Challah Bread
1. Punch down the risen dough to deflate it to its original size.
2. Separate a small piece from your challah dough (a little bigger than an egg) which you will use later to make your “challah”.
3. Divide the dough into even parts (usually three, six, or nine), depending on how many braids you want to make.
4. Roll each part into a long strand thin enough to roll under your palms(12-16 inches should work well).
5. Lay each strand alongside each other vertically so that they form an “X.”
6. Braid the dough by crossing out over the second strand, then under the third strand.
7. Repeat until you finish braiding, tucking both ends underneath when done.
8. Place challah onto a baking sheet lined with parchment paper.
Step 5: Second Rise for Braided Challah Dough
1. Cover with a damp towel or plastic wrap again now up to about half an hour, allowing them to rest and rise for a second time – this yields that fluffy interior that we all love!
Step 6: The Final Touches, Baking!
1. Preheat your oven at about 375° F
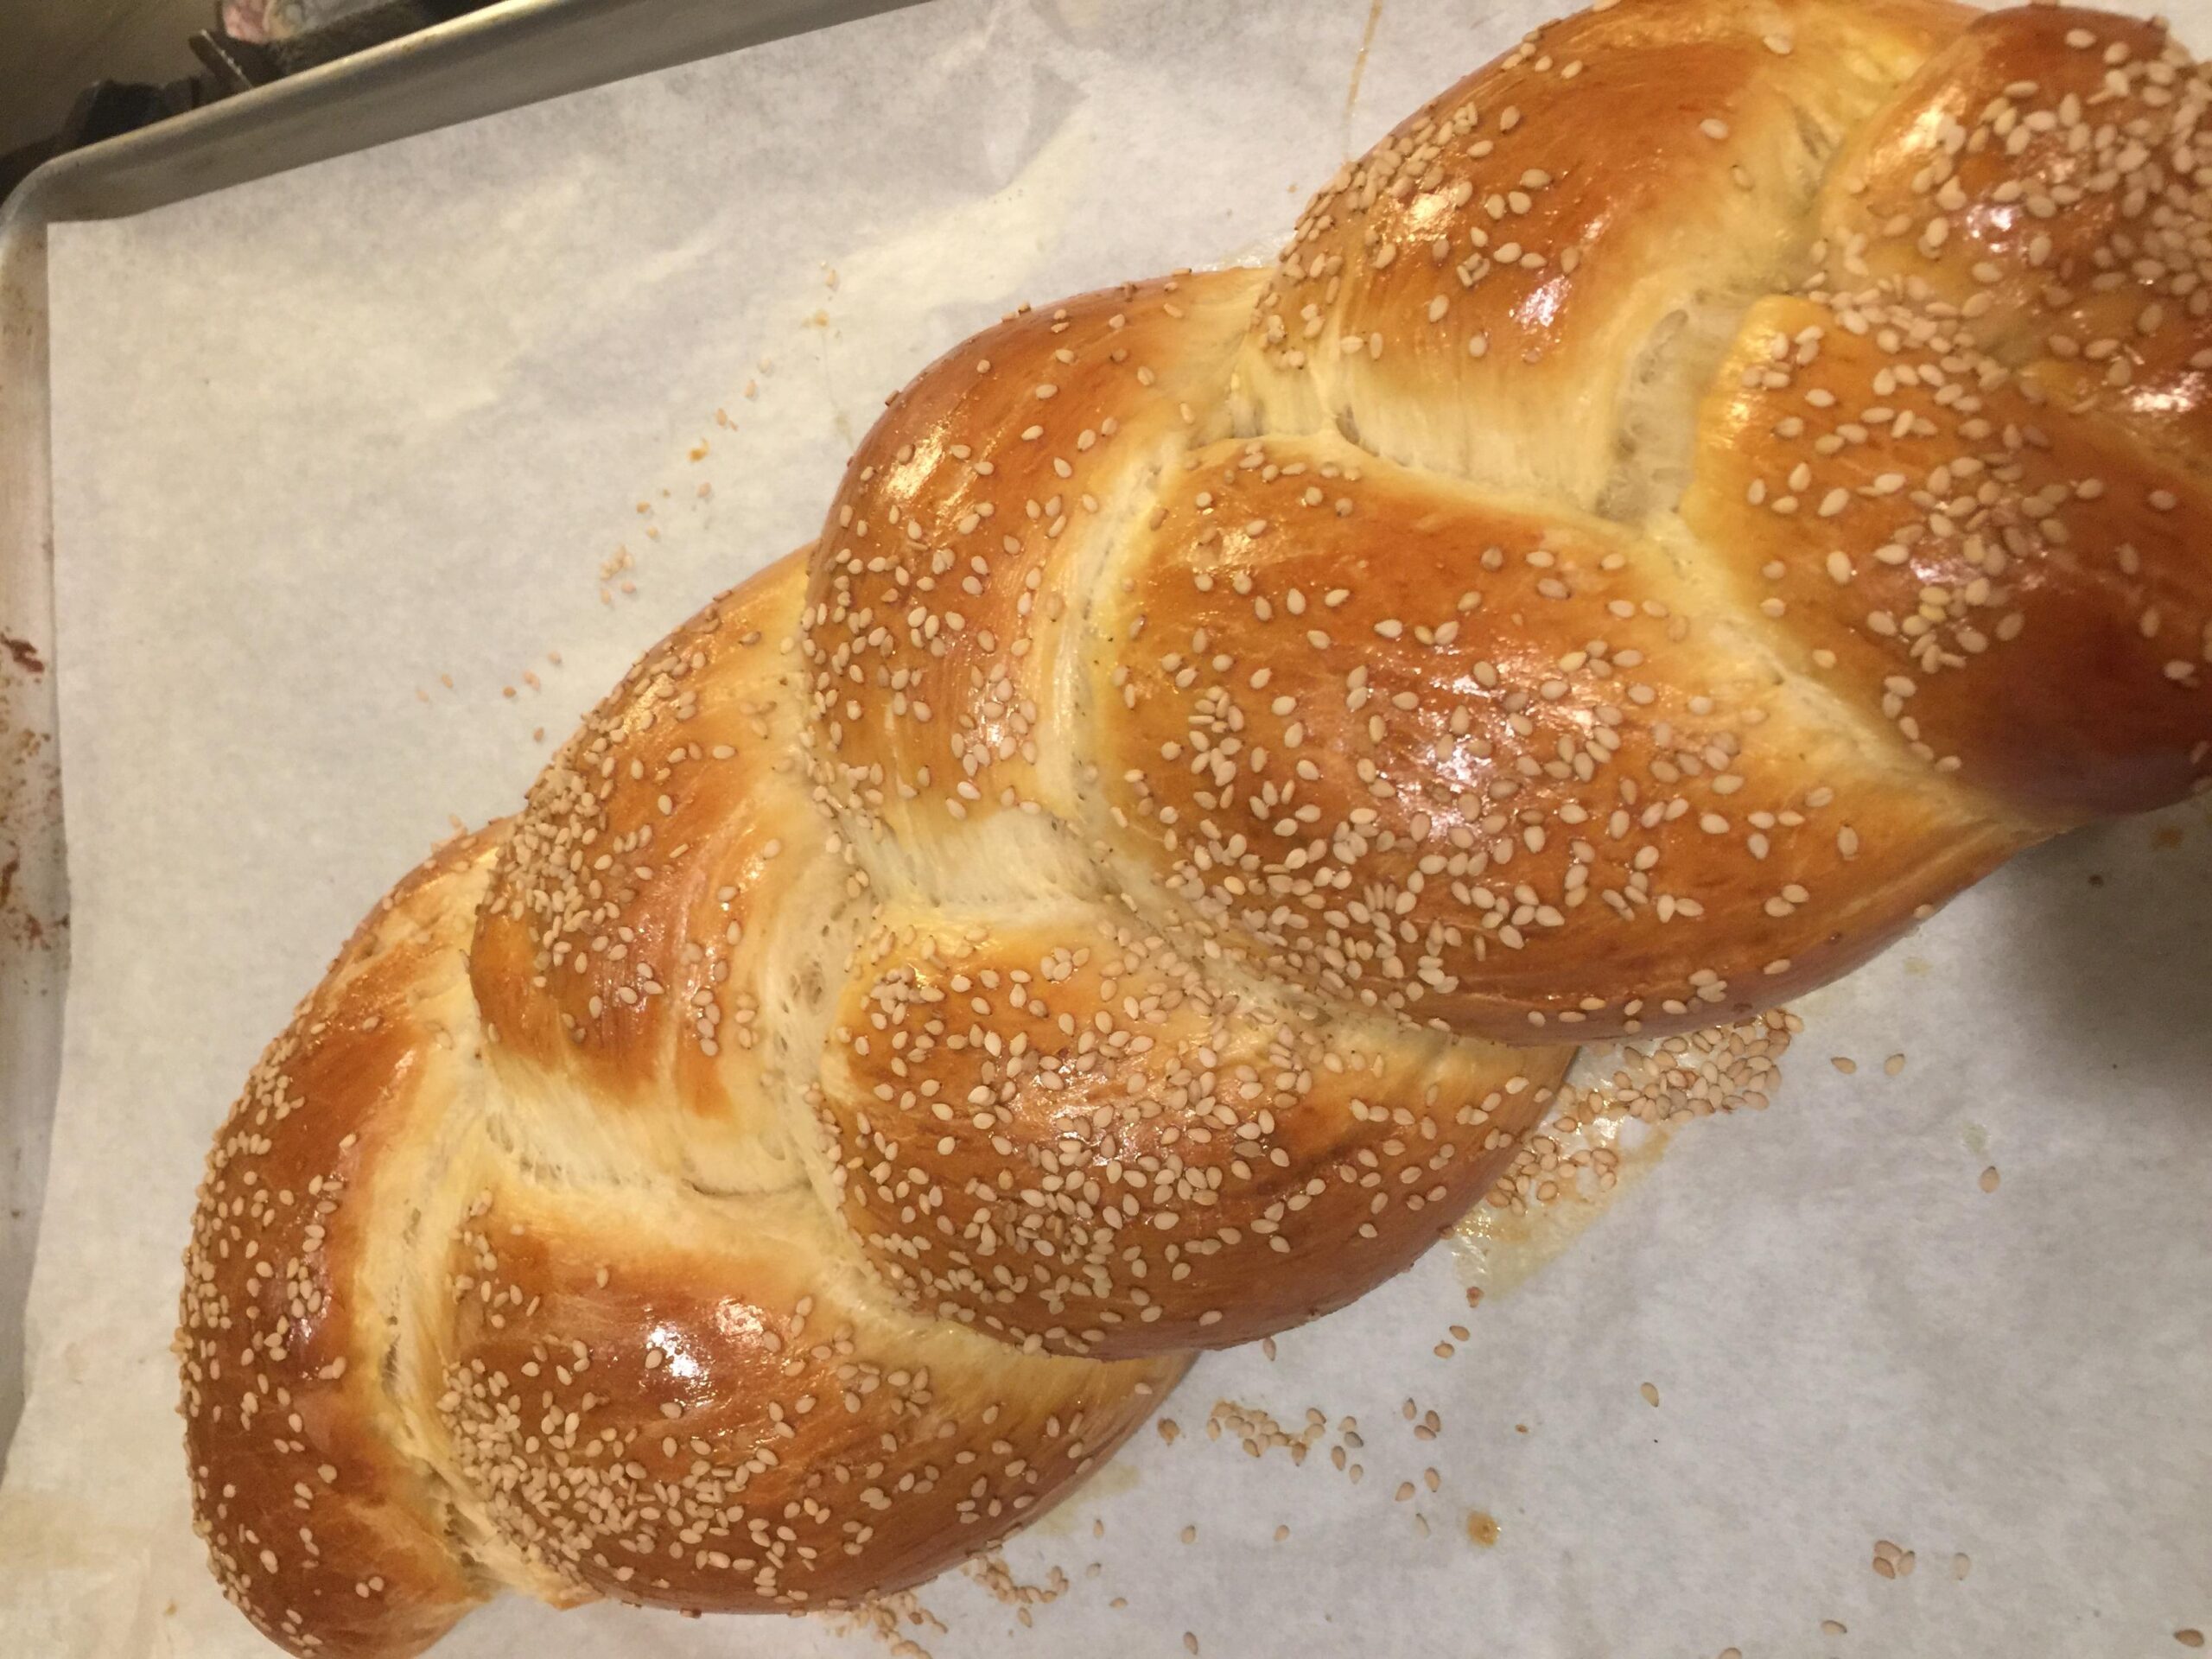
2. Brush generously with beaten eggs(sometimes people use honey) to give that beautiful glossy brown color once baked!
3. Sprinkle poppy seeds or sesame seeds, whichever you prefer!
4. Bake them for approximately thirty minutes; check after twenty-five minutes as every oven is different.
5. Insert a toothpick or skewer inside, see if it comes out clean – If yes! Then your bread loves inside!
Congratulations! You just made your own famous challah bread from
Substitutions and Variations
Looking to switch things up with your famous challah recipe? There are plenty of substitutions and variations you can try to make this beloved bread even more versatile. Here are a few ideas to get you started:
– Add poppy or sesame seeds: For an extra crunch of texture, try adding a sprinkle of poppy or sesame seeds on top of your braided challah dough before baking.
– Swap out eggs: If you need to avoid eggs for any reason, use a vegan egg substitute or try using unsweetened applesauce instead. This will slightly change the texture but it will still be delicious.
– Use honey instead of sugar: If you prefer a sweeter bread or want to achieve a deeper flavor profile, swap out the cup of sugar for half a cup of honey.
– Experiment with flours: While all-purpose flour is traditional for challah, you can switch it up by using bread flour, wheat flour, or even whole grain flour. Keep in mind though that if you use different types of flour you may need to adjust the liquid amount and kneading time.
– Make mini challahs: Instead of making one large braided bread, divide the dough into smaller portions and braid them together for individual loaves perfect for sharing.
Remember that experimentation is key when it comes to finding your perfect challah recipe. Regardless of what substitutions or variations you use, don’t be afraid to try out new ideas and find what works best for you!
Serving and Pairing
One of the most satisfying things about baking challah is enjoying it fresh out of the oven. There’s nothing quite like that warm, soft bread with a slightly crunchy crust to delight your senses. But what about serving and pairing your famous challah recipe once it’s cooled?
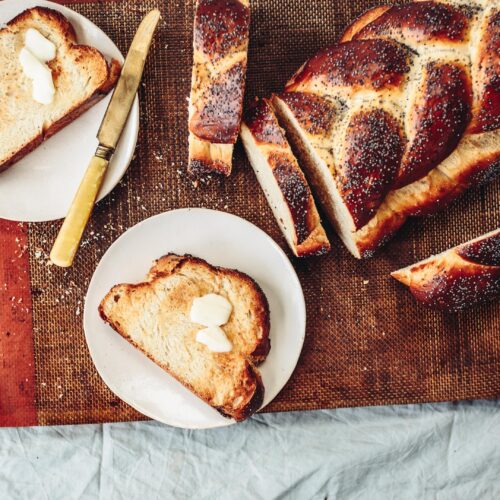
Challah bread can be served with a variety of toppings or spreads depending on personal preference. Some people prefer to eat it as is, while others like to add a dollop of butter, cream cheese or jam. You can also dip slices of challah into soups, stews, or chili for added texture and flavor.
For those who want to take it up a notch, you can make French toast out of your leftover challah bread. Simply soak slices in beaten eggs and milk before frying in butter until golden brown. Top with syrup and fresh fruit for a delicious breakfast treat.
Pairing wise, this famous challah recipe goes well with almost everything. Sweet challah is perfect for serving with tea or coffee, as a dessert or an afternoon snack. Savory challah pairs excellently with meats, cheese platters, or salads. It’s even versatile enough to serve as part of your brunch spread alongside eggs, bacon and other breakfast favorites.
In summary, how you serve and pair this famous challah recipe is entirely up to you. Whether sweet or savory, hot out of the oven or sliced for sandwiches, chilly morning breakfasts or light summer lunches – this braided bread is the perfect accompaniment to any mealtime spread.
Make-Ahead, Storing and Reheating

If you are planning ahead or need to prep ahead of time, the Famous Challah Recipe can easily be made ahead and stored in the refrigerator or freezer until ready to bake.
To make ahead, prepare the dough as per the recipe instructions and let it rise. Once the dough has risen, punch it down and place it in an airtight container. You can store the dough in the refrigerator for up to 24 hours before baking or in the freezer for up to one month.
When you’re ready to bake, remove the dough from the refrigerator, shape into a loaf, wait for a second rise and then bake as normal. This method is particularly useful if you are short on time or want freshly baked challah bread on a busy schedule.
To store any leftover challah bread, wrap it tightly in plastic wrap or aluminum foil to prevent it from drying out or going stale. It will keep at room temperature for about two days.
If you have any leftover challah bread which has turned stale, you can reheat it in the oven at 350°F wrapped in aluminum foil for a few minutes. Another great way to use up leftover challah is using it to make french toast, bread pudding or use as breadcrumbs in any recipe calling for them.
By being able to make this famous Challah recipe ahead of time and storing it properly, you can make sure that you always have freshly baked bread when you want it while reducing food waste.
Tips for Perfect Results
To achieve the best possible results with this famous Challah recipe, I would like to share with you some essential baking techniques and tips that will elevate your baking game.
First and foremost, it’s essential to measure your ingredients accurately. Baking is a science, and even a small deviation in the measuring of ingredients can make a big difference in the final product. Use a reliable kitchen scale to weigh your flour and dry ingredients for more precise measurements.
When working with yeast, always check the expiration date before using it. The yeast must also be fresh and active; otherwise, your dough may not rise properly, resulting in dense bread. To let the yeast activate properly, make sure the water used is warm but not too hot; otherwise, it can kill the yeast.
Another tip is to give enough time for the Challah dough to rise properly. The first rise should be about an hour or until it doubles in size. For the second rise, give it at least thirty minutes or until it’s puffy again as it helps the bread get its iconic fluffiness.
For a soft and tender crumb, knead your dough thoroughly before shaping into braids. Do this on a lightly floured surface until smooth and elastic. A well-kneaded dough will create strong gluten formation that defines Challah’s unique texture.
Brushing egg wash on Challah bread also plays an essential role as this helps give shine and gloss to its crust. You can add sesame or poppy seeds on top of it for added texture.
Lastly, after baking let your Challah cool down at room temperature before slicing to prevent it from drying out too quickly.
By following these tips, you’ll achieve perfectly golden brown, fluffy Challah with a gorgeous crumb every time!
FAQ
As I have shared with you the recipe and all of its details, it’s time to answer some common questions to ensure your preparation and everything around it goes smoothly. With that, here are some frequently asked questions, including tips on how to troubleshoot or adjust some ingredients in case you don’t have everything on hand.
What is traditional challah?
Challah is a classic Jewish bread that’s typically enjoyed on holidays or the Sabbath. This bread is enriched with eggs, sugar, and oil in addition to regular bread ingredients such as flour, yeast, water, and salt. Sometimes, Challah is also referred to as “egg bread”.
What is the original of challah bread?
Challah is an integral part of Jewish ritual and has a rich history dating back to ancient times. It encompasses a wide variety of bread, ranging from the rich and layered breads of Yemen to the pita pockets of Syria and the lepeshka flatbreads of the Caucasus.
What is the traditional food challah?
Challah is a unique bread originating from Ashkenazi Jewish culture. It is often braided and commonly consumed during festive occasions like significant Jewish holidays and Shabbat. However, it is avoided during Passover celebrations.
What flour is best for challah?
For this recipe, you have the option of using all-purpose flour as directed in Myrna’s original recipe. However, I prefer to use bread flour as it gives the challah a delightful chewiness without compromising its tenderness. Plus, the bread flour contributes to the impeccably braided shape of the loaf even after it’s baked.
Bottom Line
In conclusion, the famous challah recipe is a must-try for anyone who loves the taste of fresh, homemade bread. With its simple ingredient list and easy-to-follow instructions, you can have a warm, delicious challah bread in no time.
What makes this recipe even more special is how versatile it is. You can tailor it to your liking by adding various ingredients such as poppy seeds or sesame seeds. Additionally, its golden, braided loaf will impress your guests and make them think you’re an expert baker.
Furthermore, the art of making challah bread has been passed down through generations and has a rich history in Jewish culture. By learning and mastering this recipe, you are continuing this tradition and preserving its significance.
So don’t hesitate to give this famous challah recipe a try. Whether you’re a seasoned home cook or new to baking, you are sure to enjoy the mouth-watering flavors and aromas that will fill your kitchen as you make this delicious bread.
Famous Challah Recipe
Ingredients
Challah
- 3 1/2 cups all-purpose flour, plus
- 3 1/2 cups all-purpose flour
- 2 (1/4 ounce) packages dry yeast
- 1 egg, beaten
- 1/2 cup vegetable oil
- 1 tablespoon salt
- 1/2 cup sugar
- 2 cups warm water (80 -90)
Glaze
- 1 egg, beaten
- poppy seeds (optional) or sesame seeds (optional)
Instructions
- First measure out all your ingredients.
- Now from the 1/2 of cup sugar take 1 tablespoon of the sugar & combine it with the yeast& warm water (you know you have the right temperature of warm water when it's the same temperature as the inside of your wrist).
- I let my mixer bowl which is metal (kitchen aid) sit in a hot water bath while the yeast dissolves, 10 minutes.
- After the yeast has dissolved (it's nice & foamy) add to it the rest of the sugar, salt & 3 1/2 cups flour.
- Mix well (I use the bread hook).
- Add egg (already beaten) & oil.
- Slowly start mixing in most of the remaining 3 1/2 cups of flour.
- The dough will become quite thick.
- When the dough pulls away from the sides of the bowl, turn it onto a floured surface& knead for approximately 10 minute.
- Add only enough additional flour to make dough manageable.
- Knead until dough has acquired a "life of its own"; it should be smooth & elastic, springing back when pressed lightly with your fingertip.
- Place dough into a large oiled bowl turning the dough once so its oiled on all sides.
- Cover with a damp towel & let rise in a warm place for 2 hours, punching down in 4-5 places every 20 minutes.
- Now, I always write down what time I started so I don't forget when the 2 hours are up & set a timer every 20 minutes. (In the summer I let the dough rise on my balcony & in the winter in front of my oven where something is always baking, turning it every time I punch down the dough).
- After the 2 hours, turn your dough onto your working surface.
- Now comes the forming part.
- For Shabbos I always make a 2 level braided challah which looks great & is really easy.
- Prepare your baking sheet lining it with parchment paper.
- Preheat oven to 375°F.
- First, take a large knife & cut the dough in half.
- Next, from each 1/2 now cut off a third & place the 2 thirds on the side.
- Now, from the first half (where you've removed a third) divide the remaining dough into approximately equal thirds.
- Roll each third out till its about 10-12 inches (I'm guessing I never measured it) & braid all 3 roll together pinching the top & bottom half together& turning them slightly under.
- Place on baking sheet.
- Repeat the same for other half.
- Now take the first third you removed earlier& divide in 3, braid just like you did before& place on top of the already braided challah.
- Repeat same for other third.
- Now let the challah rise for 1/2 an hour.
- After the challah has risen glaze with beaten egg & add mohn or sesame if you wish.
- Almost done!
- Put in preheated oven & let bake for exactly 25 minutes!
- Turn off oven & leave Challahs in for exactly another 10 minutes!
- Remove from oven.
- Enjoy--you deserve every compliment you get!